RUSS' OLD RADIOS
  • HOME
  • FOR SALE
    • CURRENTLY AVAILABLE
    • DO IT YOURSELF SPECIALS
    • EXCEPTIONAL DEALS
    • WITH MP3 PORTS
  • RESTORATION
  • BLOG
  • BEFORE/AFTER
  • CONTACT US
  • UNIQUE RADIOS
  • 1920'S Superheterodyne

More-faux

7/16/2016

0 Comments

 
Picture
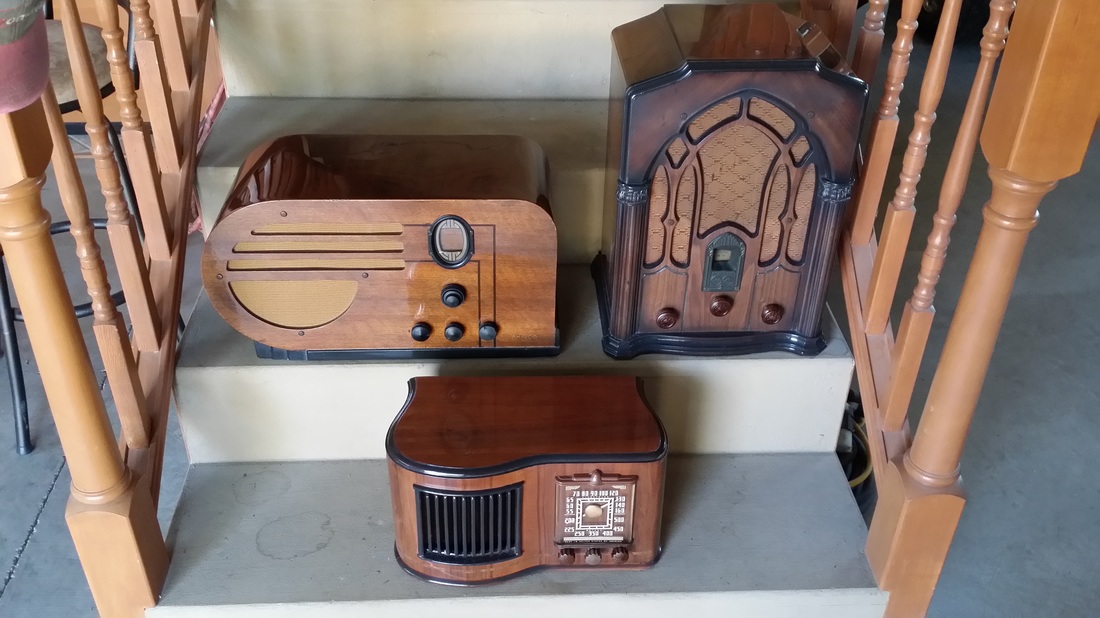
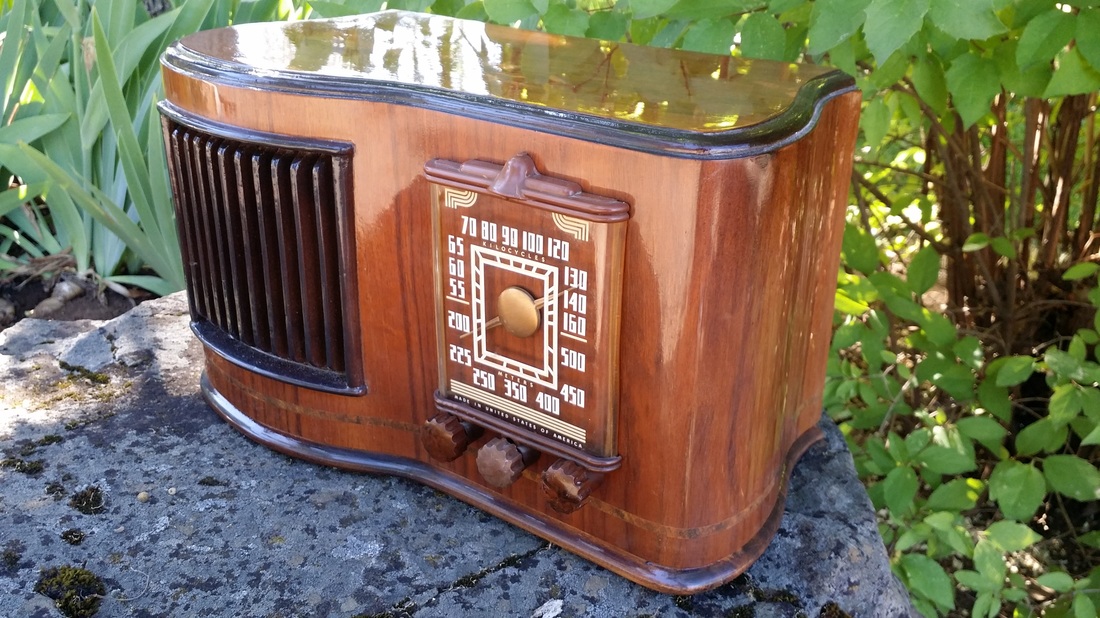
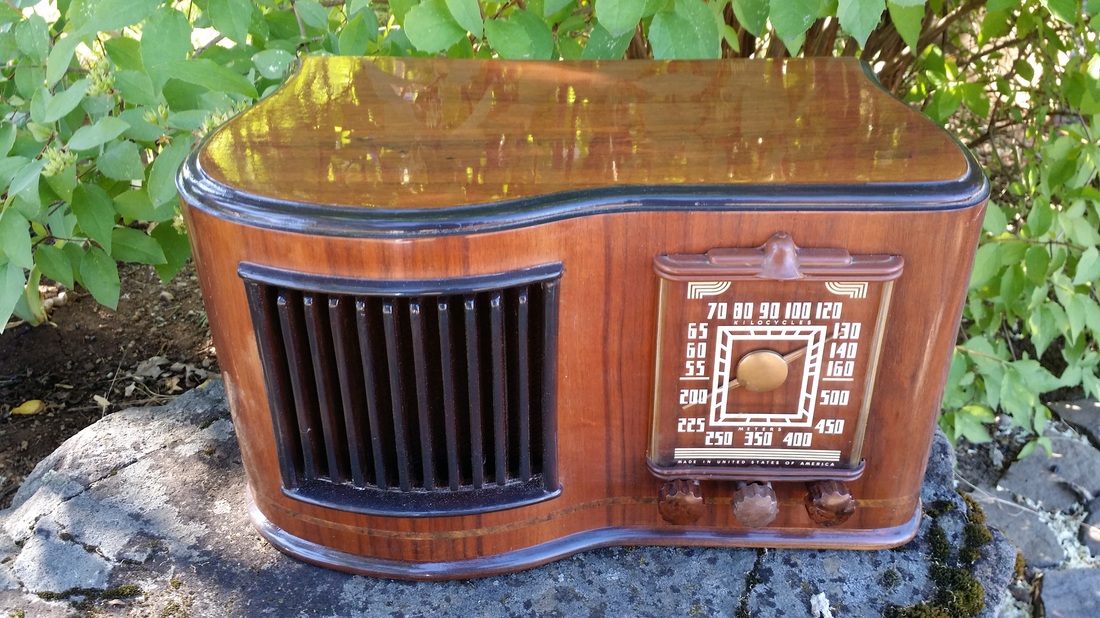
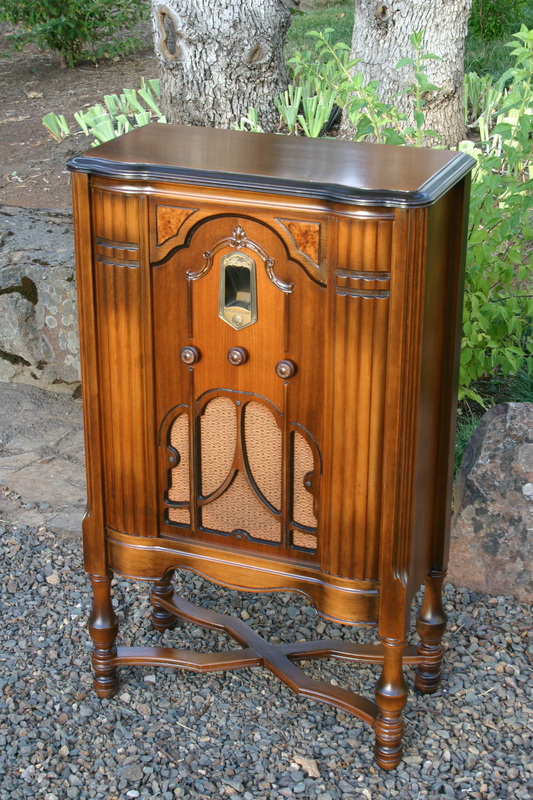
This Knight - often sold under the Sonora brand, was another one of the radios in the group referred to in the previous post. It is one of those radios that is sometimes referred to as having an Ingraham cabinet. And,, in reference to this topic in particular, is one of the reasons that I would disagree. The Faux band at the bottom and the Repwood-like grill are not typical for cabinets made by Ingraham.
Picture
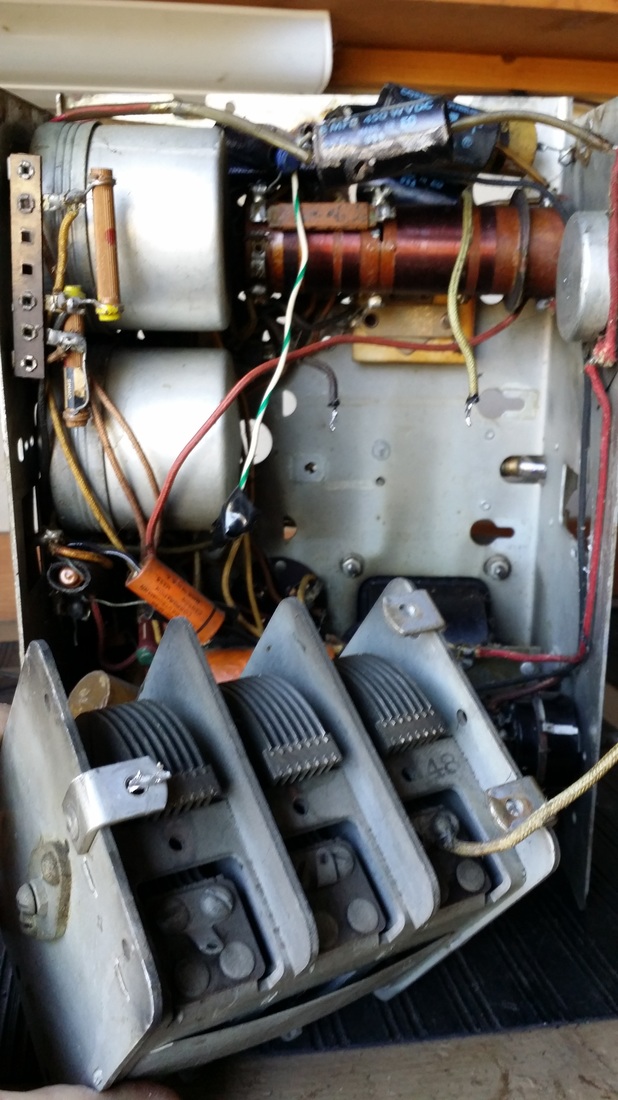
Sealer and a couple of coats of lacquer applied here. Now time for the fun - and I do enjoy adding the faux finish. But I generally prefer cabinets that did not use it - Did you know that the 1932 RCA BI-Acoustic is almost completely photo finish?
Picture
Anyway, back to the little radio.

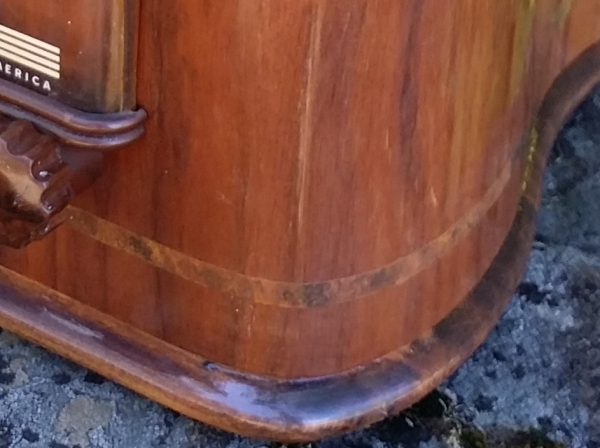
The Knight version, or at least this one, had a darker grill than most of the Sonora models and "Knight" emblazoned across the front under the knobs. I couldn't find a Knight decal, which was OK since I didn't really like the look of it anyway. I can always put one on later. That band on the bottom did need to be restored. It was not too large and ads some personality to the cabinet.
Picture
Picture
Carefully heating the warped Tennite escutcheons allowed them to be straitened.
Picture
0 Comments

1931 RCA R-8 Superette ------or-------       You really have to like this radio to want to work on it!

7/14/2016

1 Comment

 
Picture
This 1931 RCA R-8 Superette was acquired with 3 other radios. I have always wanted one of these. The cabinet had been sanded here and there and top coated with a flat finish so it was going to need a refinish and a few knobs.
Picture
As found - 8 tube R-8 chassis. Pretty much all of the caps and resistors you can see were supposed to be someplace else. The original cap can had been thrown away. Additional odd modifications included attaching the secondary of the interstage transformer to the cap on the IF amp tube and some really creative wiring to compensate for the replacement volume control which did not have the necessary AVC Tap.

As with most radios I acquire, no attempt was made to power this one up prior to the rebuild but I really wonder if it ever worked after this "repair".

With some luck, one of the fellows on the Philco Phorum site had an original cap can, so I was off to a good start.

People hate these chassis. they were used in consoles like the R-10  with the same speaker, pictured below. In this case a GE J-85. This version uses 8 tubes with one dedicated to the AVC which was a step up from the 7 tube chassis. An even more cramped 9 tube chassis had push pull output tubes,
Picture
So the chassis was about a cramped as they get.

The resistors and caps, not found in the can, are mounted to a board which is mounted so that the parts are inaccessible. Both if the IF transformers are mounted under the chassis.

So, if you are ever inspired to work on one of these, or the 7 tube version, or the 9 tube version, I have a few tips.
Picture
First, completely remove the tuning cap. This is actually not hard at all. It will give you the room to work on the chassis.
Remove the cap can. Cut the leads about a inch away from their connections. Leaving this pig-tail will help you find the point to reconnect the NEW cloth covered wire you will use in rebuilding the cap can.

At this point I should mention that I have been finding more and more 1930s radios that need either a significant portion or all of the original cloth covered wire REPLACED. This has been true for rubber insulated wire for years now, but, as time passes more and more of the original cloth covered wire is becoming unsafe. The wire in a lot of Atwater Kent power supplies and that used in many AK power transformers also comes to mind.

In all, I replaced about 80% of the wire in this chassis.
Picture
Picture
Since you are going to replace much of the wire, the next step is only logical. Trying to turn the board over (above) with the wires connected is going to break the insulation on many of them. So just plan on taking it out, rebuilding it and reinstalling it with new wire.

Pictured below with most of the dog-bone resistors replaced and the 2 caps rebuilt. The resistors were replaced with new recast resistors with at least a 2 watt rating for a better safety margin. And one resistor was put back were it was supposed to be. The big wire-wound on the left was probably not original
Picture
Picture
Above - All of the stuff that was replaced.
Picture
NOW, WASN"T THAT EASY?

It looks a lot better. I did not expect it to work on the first try BUT IT DID!

After an alignment and a little work on the cabinet, (Below) it was put on display.
Picture
The original grill cloth had a couple of small defects but I decided to use it anyway.
1 Comment

    Author

                         Russ Webb

    Picture
    Russ Webb & Fuzzy

    Best Buddy, Radio fixer


    Categories

    All
    All
    Antiques
    Electronics
    Radios
    Repair
    Restoration
    Travels
    Vintage

    RSS Feed

    Archives

    March 2023
    November 2022
    October 2022
    July 2022
    January 2022
    December 2021
    September 2021
    June 2021
    April 2021
    February 2021
    January 2021
    November 2020
    July 2020
    June 2020
    April 2020
    March 2020
    December 2019
    October 2019
    May 2019
    April 2019
    March 2019
    February 2019
    January 2019
    December 2018
    November 2018
    October 2018
    September 2018
    June 2018
    April 2018
    March 2018
    February 2018
    January 2018
    December 2017
    November 2017
    September 2017
    June 2017
    May 2017
    April 2017
    February 2017
    December 2016
    November 2016
    October 2016
    September 2016
    August 2016
    July 2016
    June 2016
    May 2016
    April 2016
    March 2016
    February 2016
    January 2016
    December 2015
    November 2015
    August 2015
    June 2015
    May 2015
    April 2015
    March 2015
    February 2015
    January 2015
    December 2014
    November 2014
    October 2014
    September 2014
    August 2014
    July 2014
    June 2014
    May 2014
    April 2014
    March 2014
    February 2014
    January 2014
    December 2013

CUSTOM DESIGN BY SUE WEBB  06/2013       Redesigned by Russ Webb     Approved by Fuzzy   Updated:  Pretty much all the time, but I forget to change this date
Proudly powered by Weebly
Photos used under Creative Commons from valart2008, rafeejewell