RUSS' OLD RADIOS
  • HOME
  • FOR SALE
    • CURRENTLY AVAILABLE
    • DO IT YOURSELF SPECIALS
    • EXCEPTIONAL DEALS
    • WITH MP3 PORTS
  • RESTORATION
  • BLOG
  • BEFORE/AFTER
  • CONTACT US
  • UNIQUE RADIOS
  • 1920'S Superheterodyne

Scott Phantom

12/30/2019

12 Comments

 
Picture
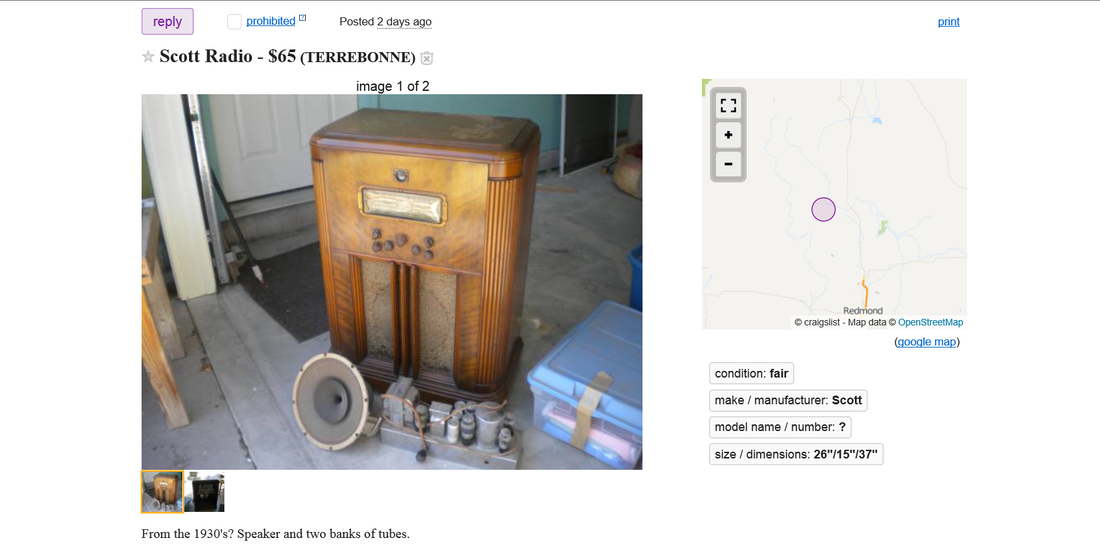
CL ad,       Only a couple of hundred miles away. To the Radio Rescue Vehicle Robbin - er, ah, Sue!
Picture
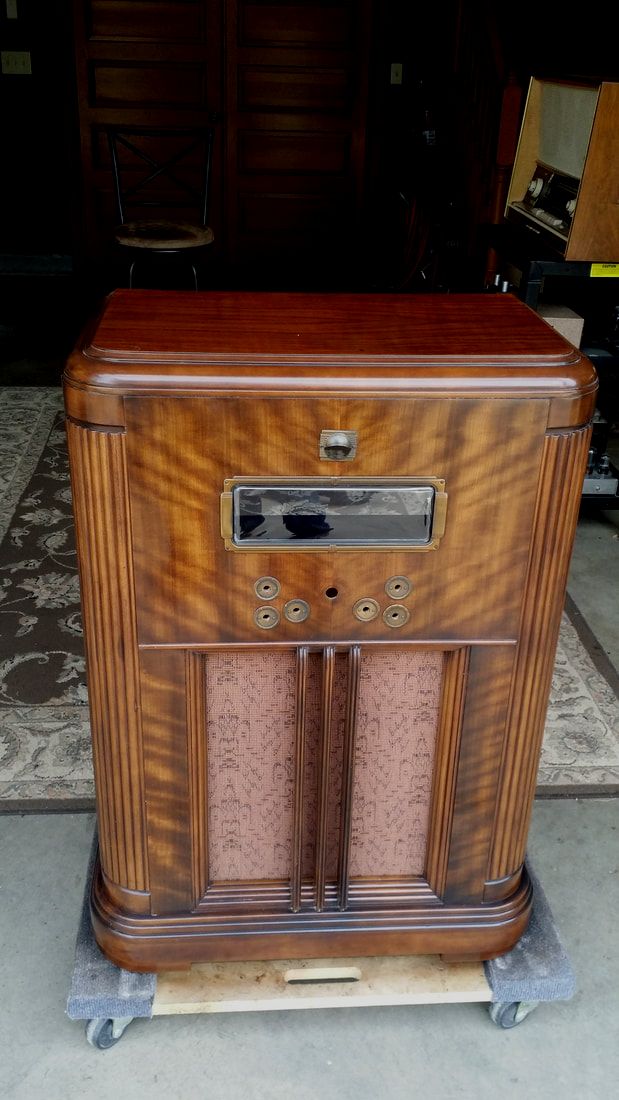
Seems that there are several Scott Phantom versions including the Phantom Deluxe and the FM versions. This is the 18 tube variety without FM.
Picture
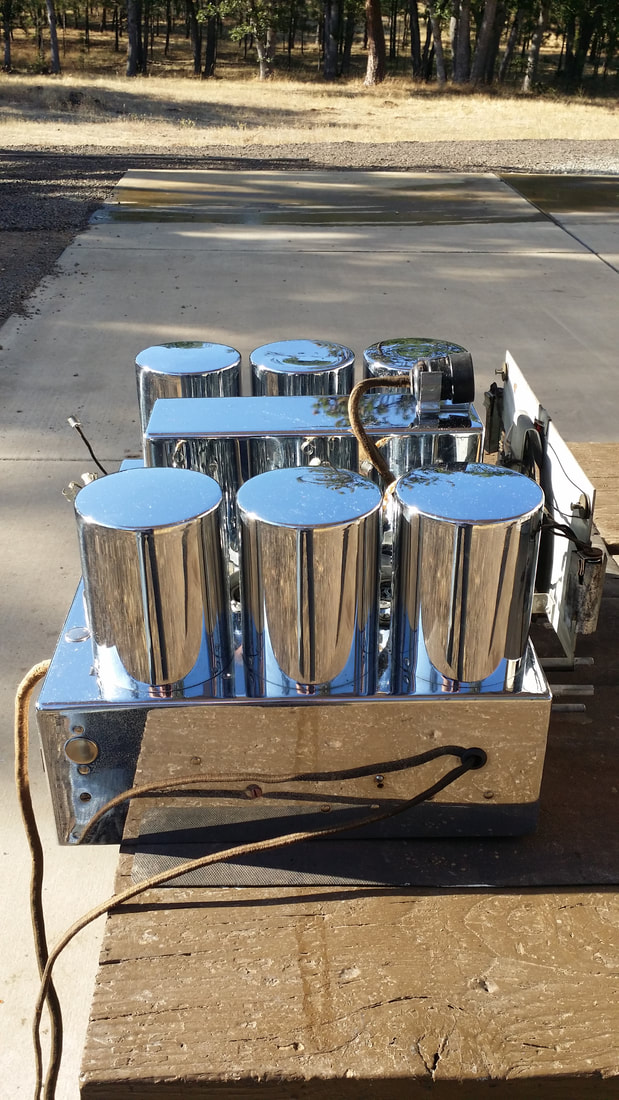
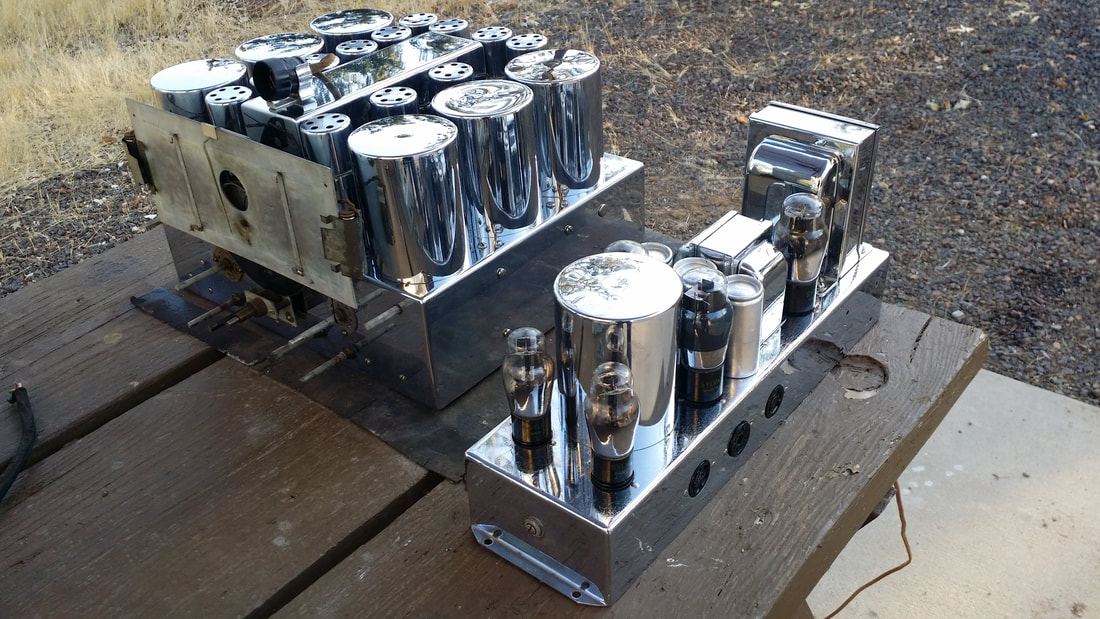
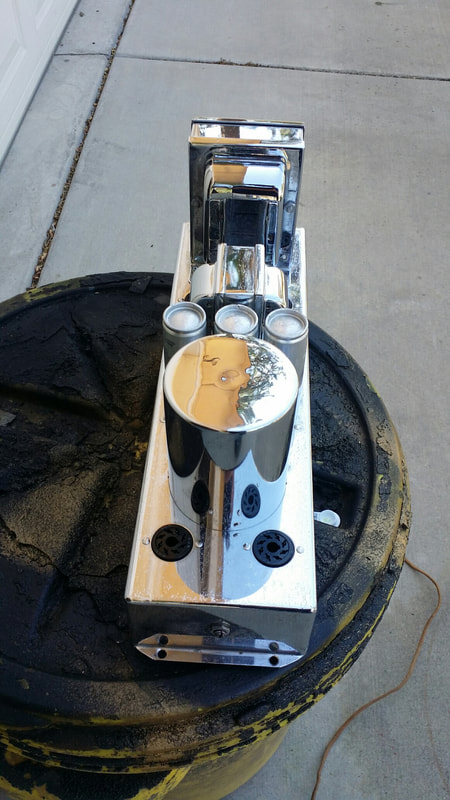
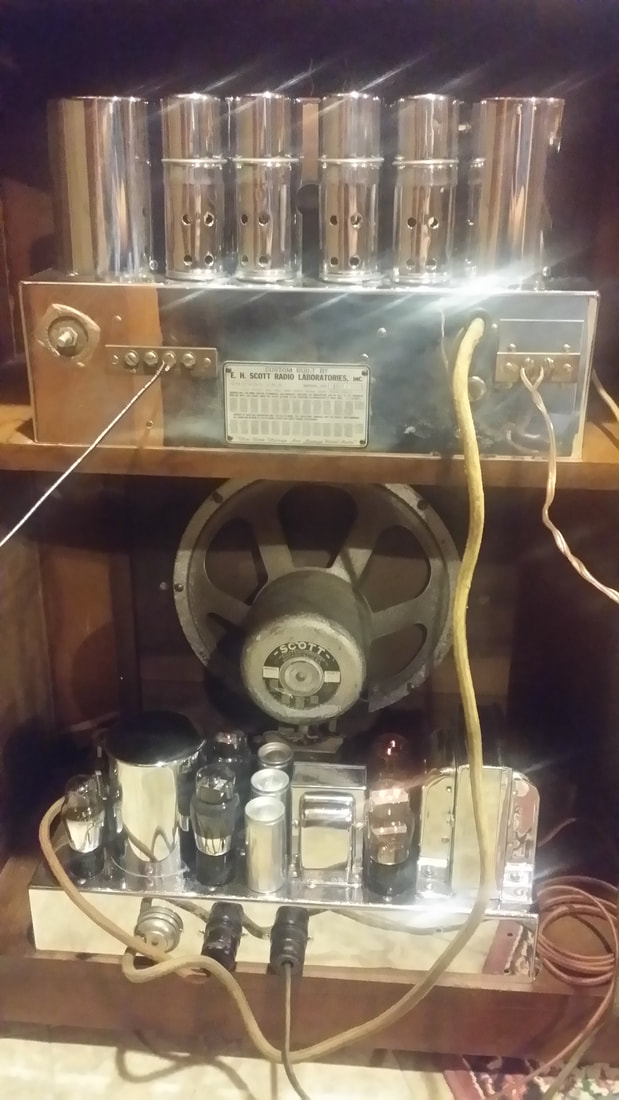
Probably the first thing people notice about Scott radios is the chrome - or the tubes or the - - -. Anyway, the chrome on this one was a solid 9 out of 10.
Picture
If one of these has a lot of rust or, more often, flaking chrome the cost/difficulty of restoration increases exponentially.

SEE:     ​https://www.russoldradios.com/blog/77-chrome-plated-rivets

Picture
As Found - In mostly original shape - only what's going on with that Candohm (top)?
Picture
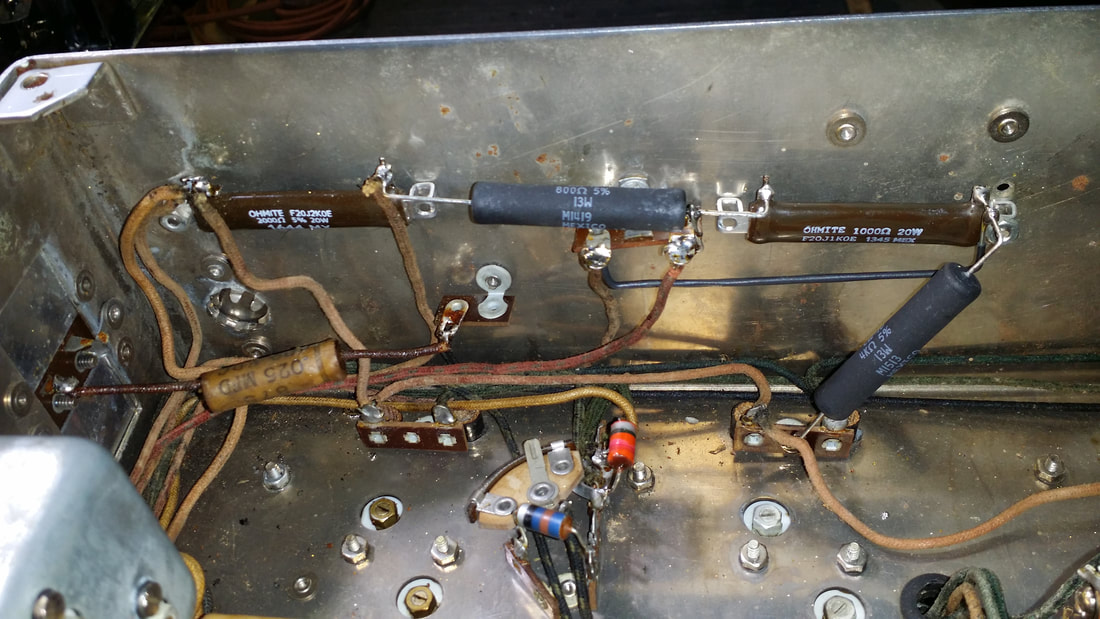
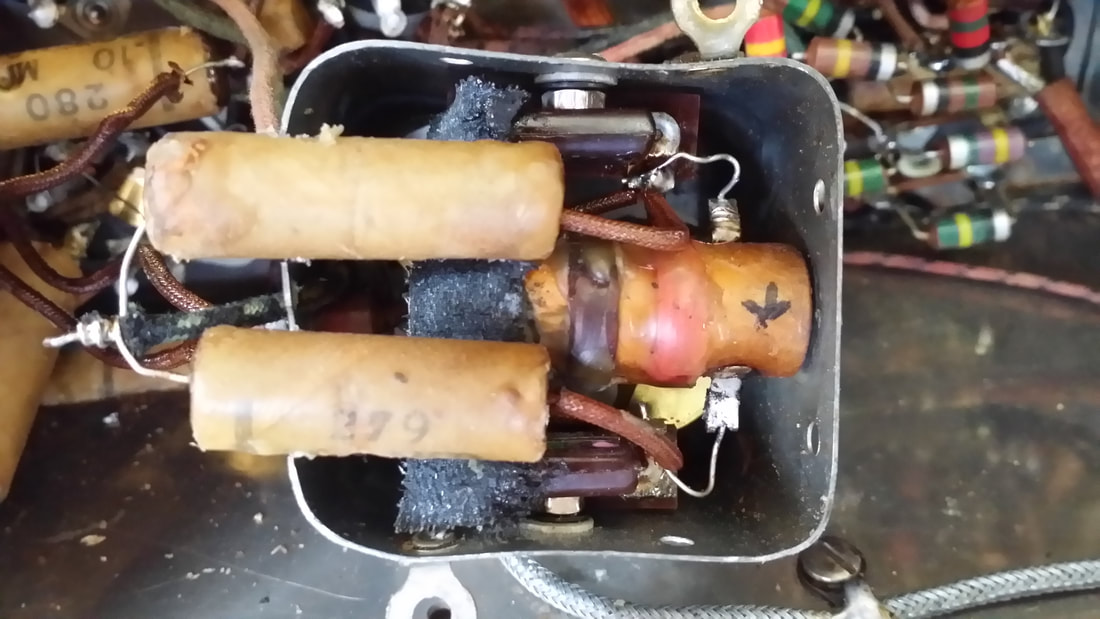
I used 2 of the new chassis-mount Ohmite wire-wound resistors for the replacement of the missing voltage divider (brown). Yeah, they are at a little bit of an angle since the new assembly could not use the holes for the original Candohm and I am reluctant to drill any new holes.

I am happy to see a manufacture making resistors of this type. The only drawbacks are the cost and limited resistance values, which is why I had to use 2 wire wound axle resistors in the assembly.
Picture
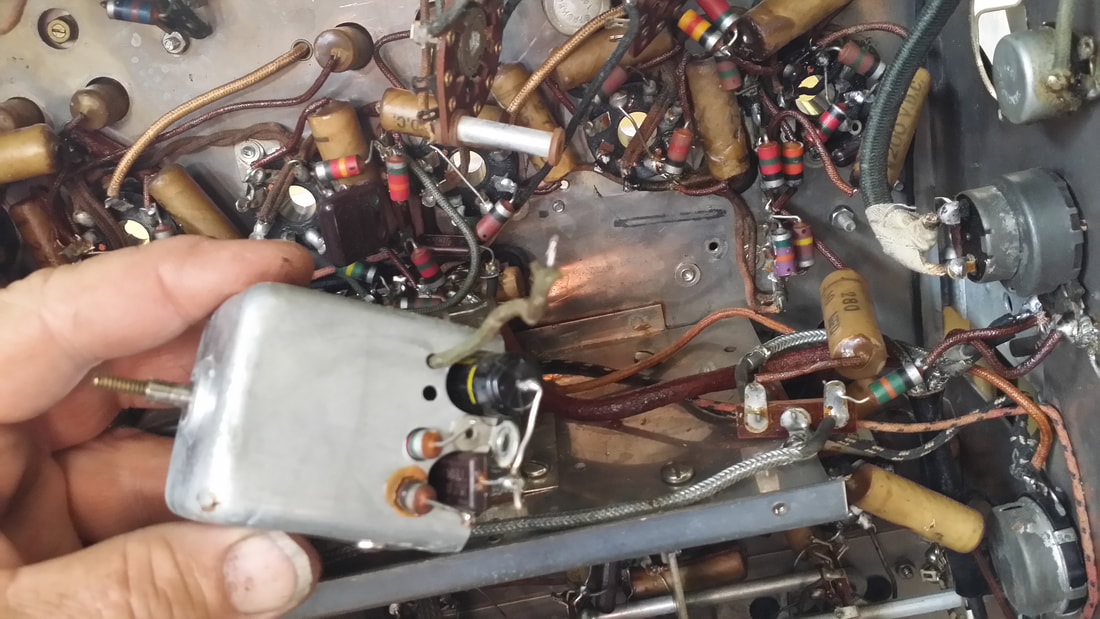
Some of the caps are really hard to get to/service. This transformer is following the 3rd IF tube prior to the 6H6 Detector.
Picture
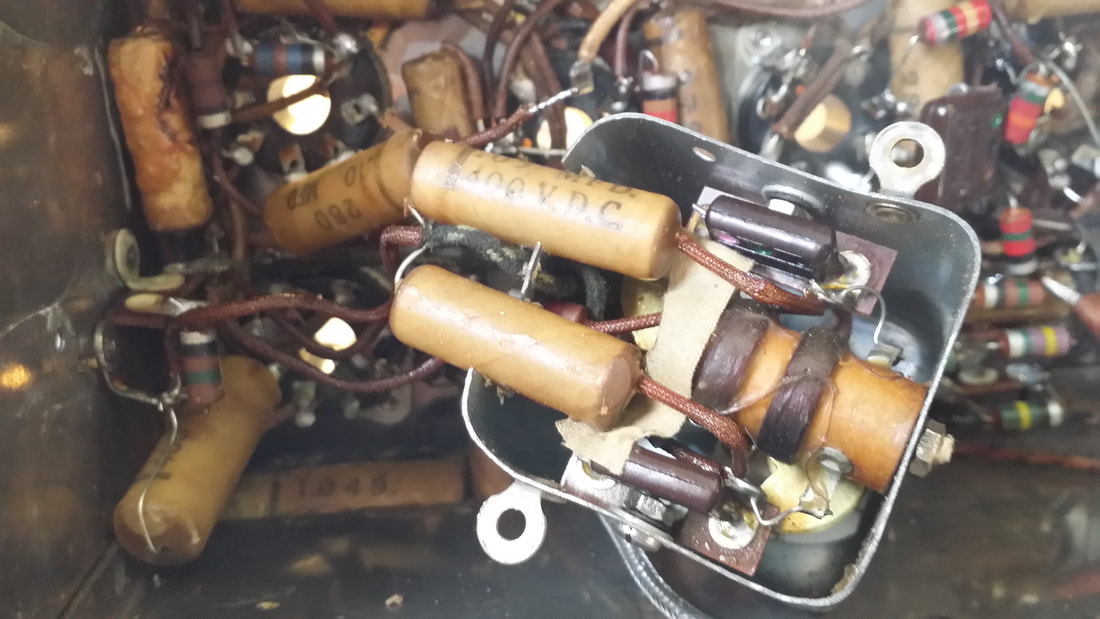
This is the transformer Associated with the RF AVC 6B8G . It is also hard to service and in this case a real pain since one of the windings was open. The only real option is to remove and repair the whole assembly.
Picture
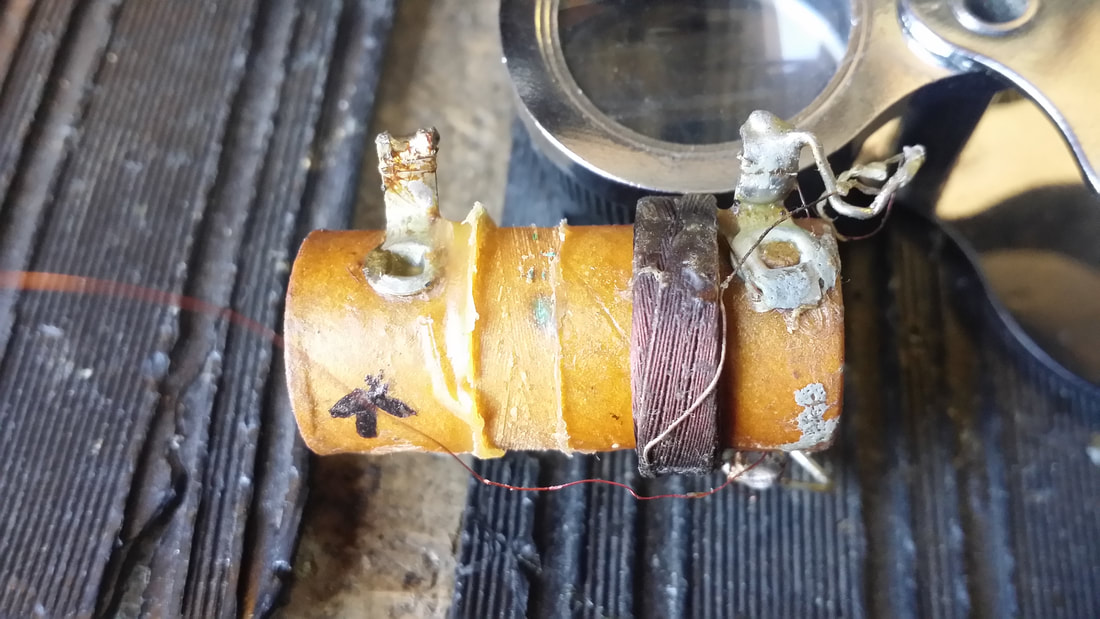
I counted the number of windings as I removed the old coil and replaced it with the same number of turns. The old windings were not burnt. See the little green stain on the form (center where the coil was removed)? This corrosion of the copper wire was found in multiple locations while unwinding the failed coil.
Picture
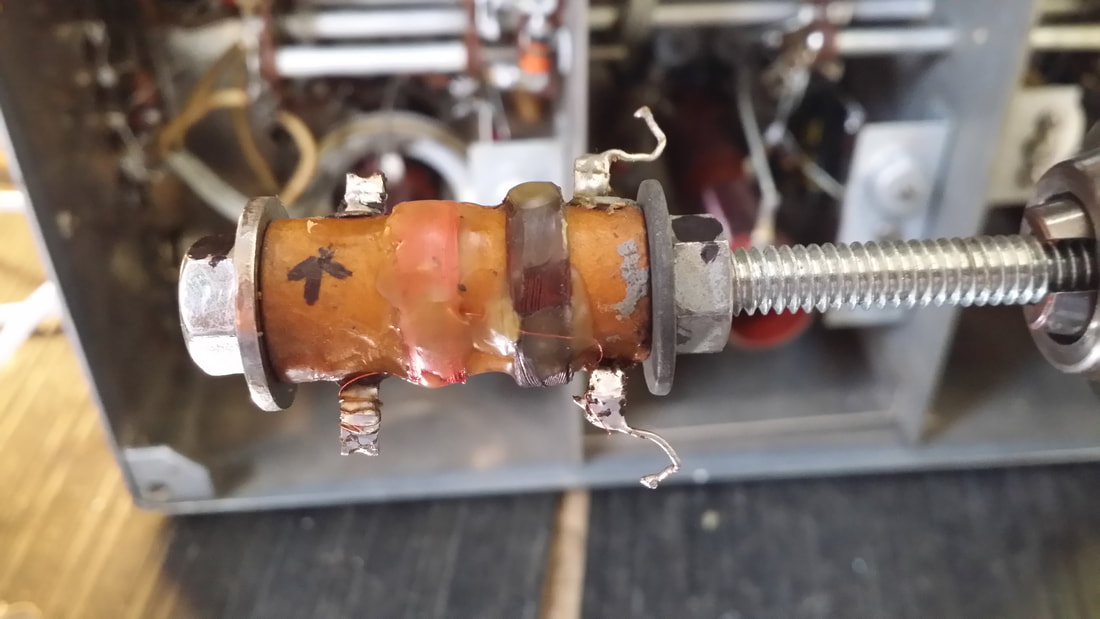
Since I could not wind the new coil with the same basket technique as the original I measured the inductance of the original and matched it by removing a couple of turns on my new winding. Important: note the direction of the turns (arrow). As I recall, This coil was less than 60 turns.
Picture
Caps restuffed and ready to reinstall.
Picture
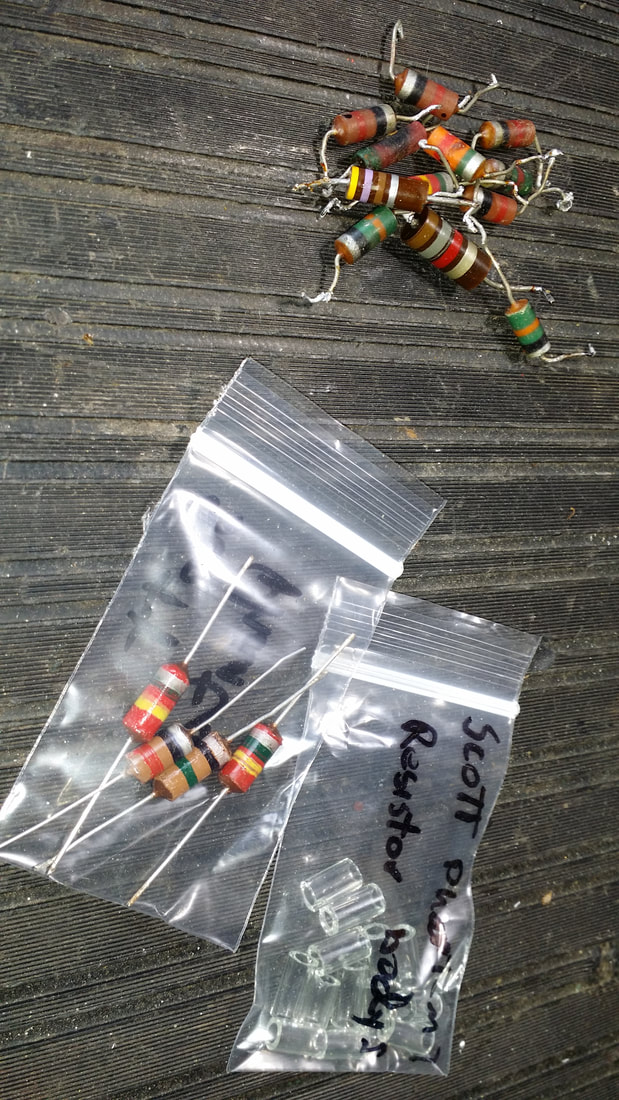
There were quite a few of the original carbon resistors that were out of spec.  So I made some replacements using modern equivalents (or greater wattage) potted into glass tubing. The hard part is painting the bands which indicate the resistance.
Picture
Glass tubing and a  cutter.
Picture
Picture
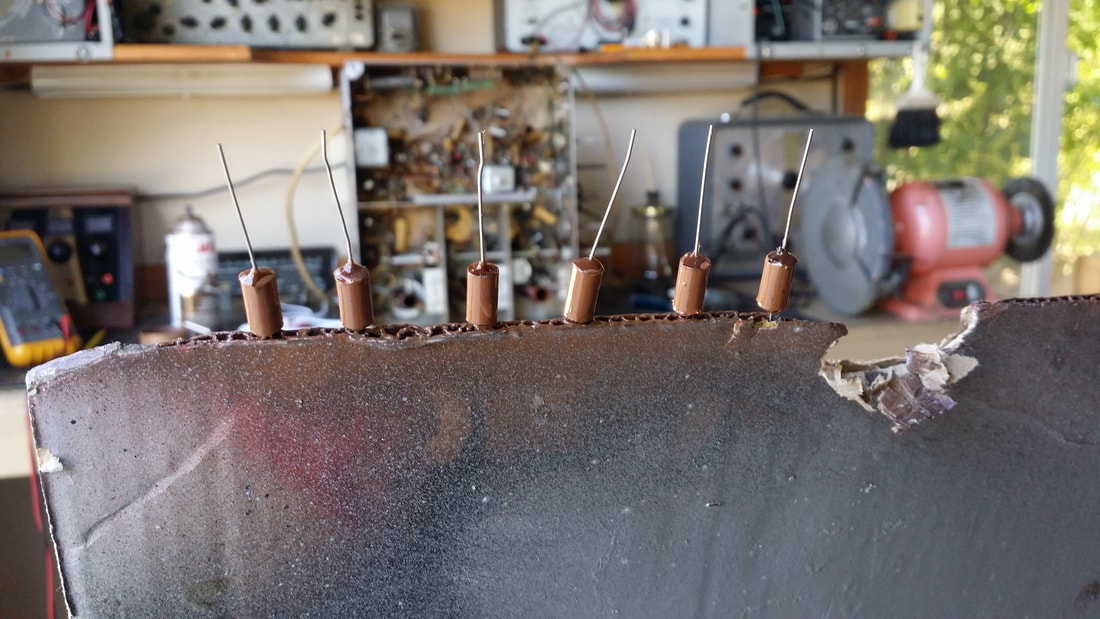
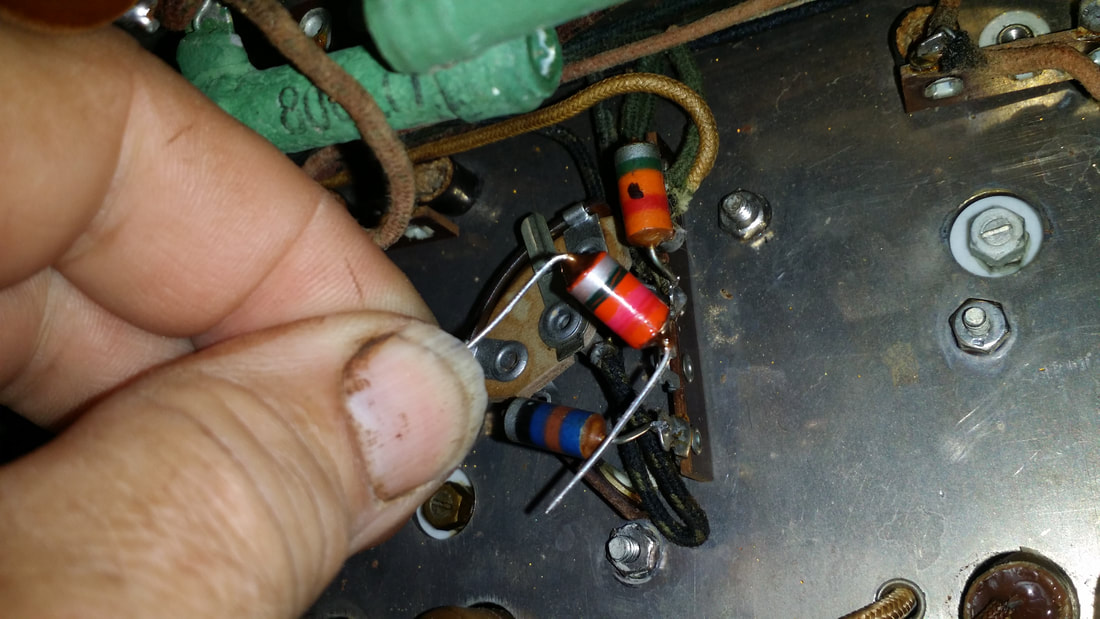
I mark out of tolerance resistors with a black dot as I do the initial survey - replacement in hand.
Picture
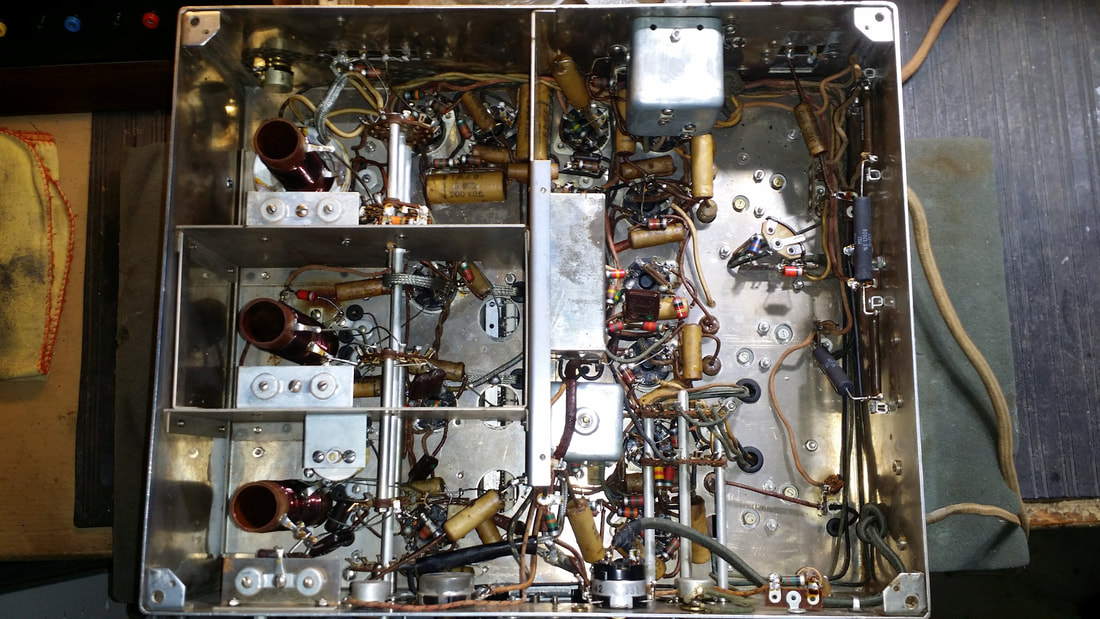
Parts replacement finished, time for alignment.

As I started the alignment I noticed audio levels were lower than I expected. I thought it would improve as I proceeded - it did not.

OK! Everything looked good. All voltages were correct and the alignment results were as expected only with little improvement in audio level AND now that I could drive the output harder (following alignment), there was some serious distortion particularly in the bass response.

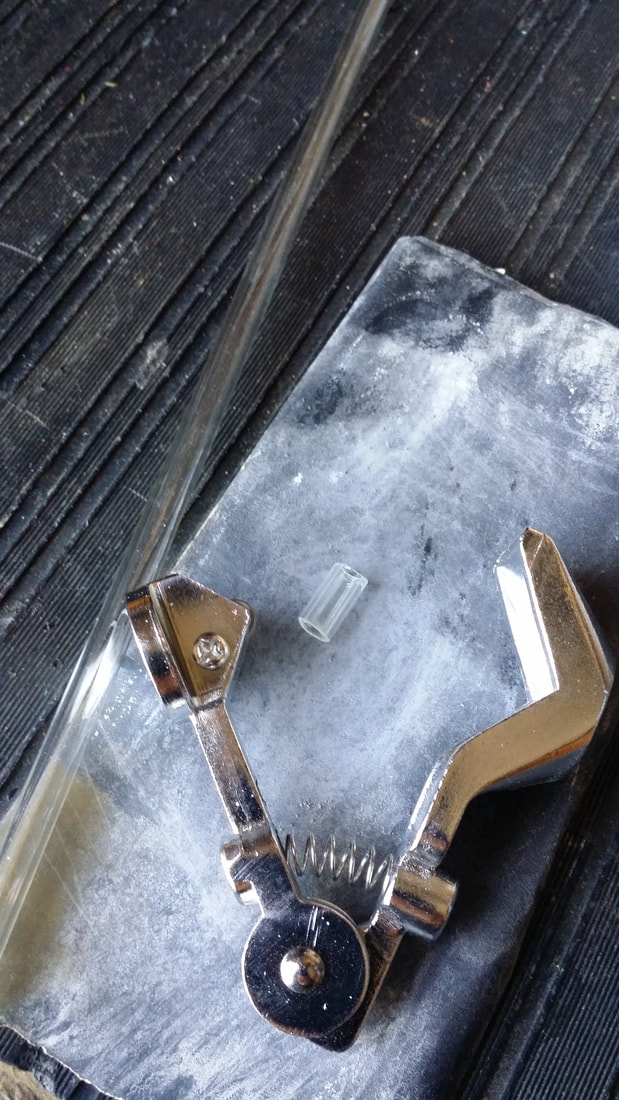
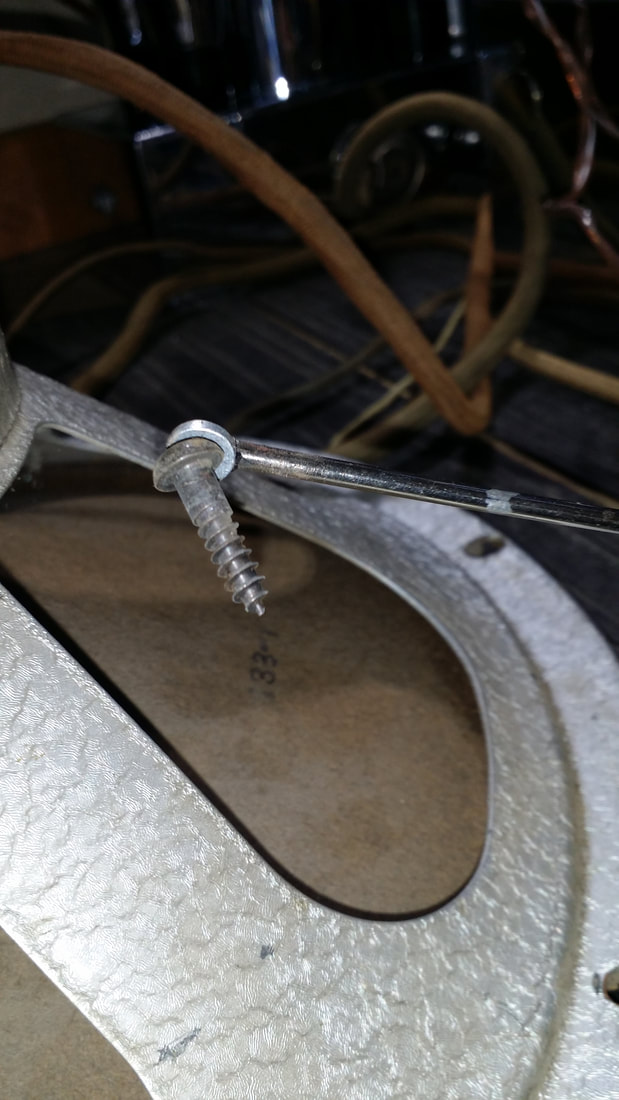
You all know Occam's razor - If the speaker sounds bad, maybe it's the speaker. Well, it didn't hurt to check everything else first, but it was the speaker. Not a bad cone or transformer. No, it as much more simple. The voice coil former had been screwed - more precisely, there was a screw lodged between the former and he frame.
Picture
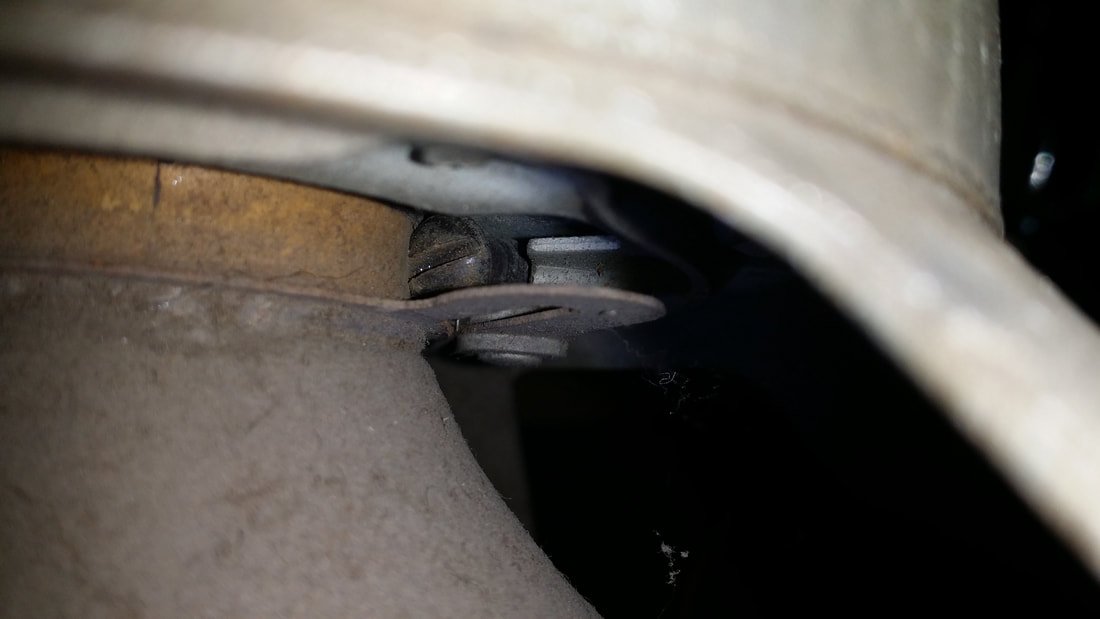
The culprit - a wood screw. 

This screw seems to be of about the same vintage as the radio. It had been lodged here for long enough that it had made a wear-mark or dent in the coil form. It makes me wonder if the original owner had ever heard this radio working as it should.
Picture
Spending most of a day finding a needle in a haystack, but a big improvement. 
Picture
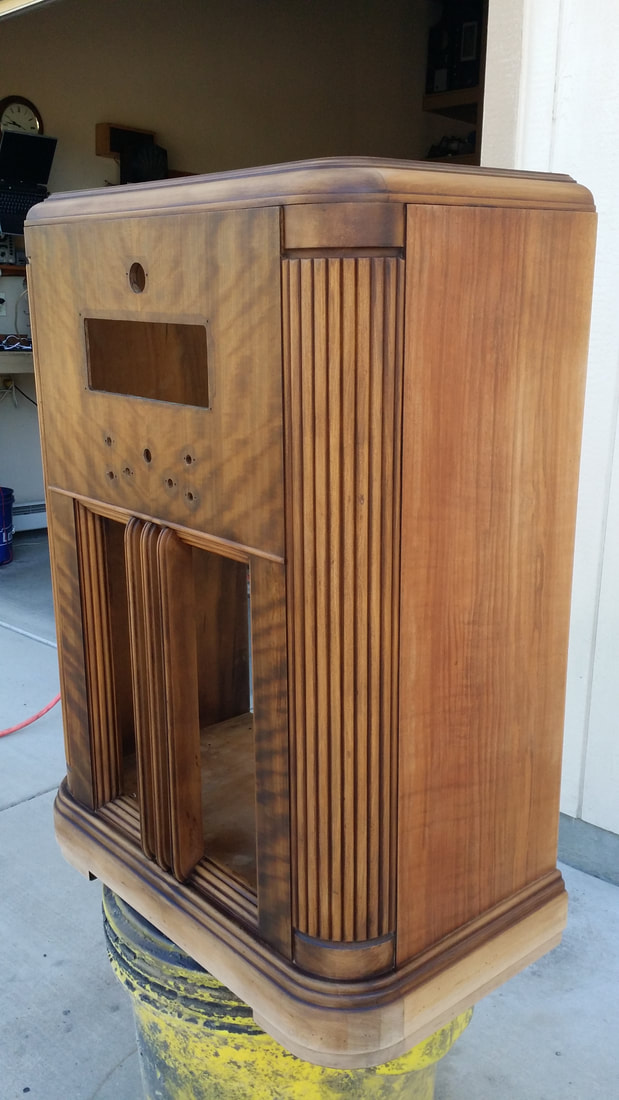
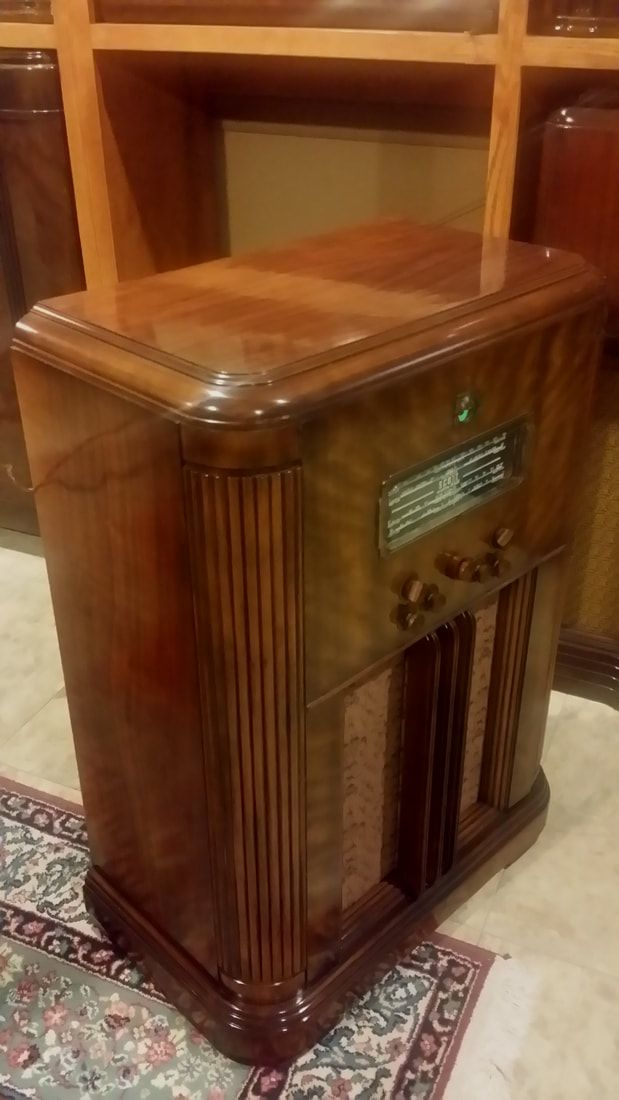
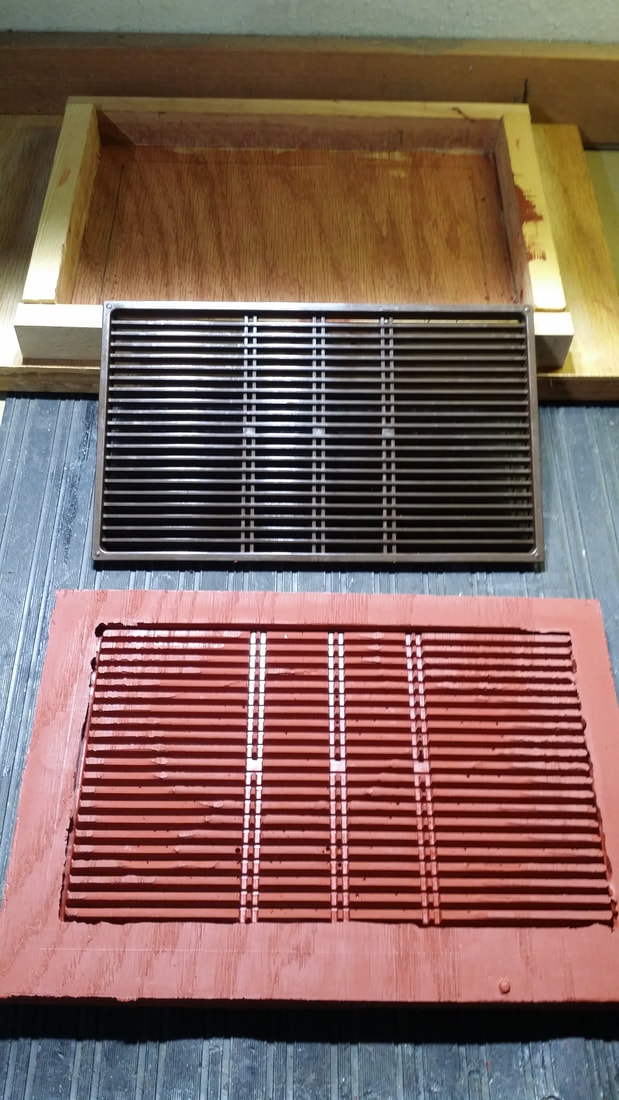
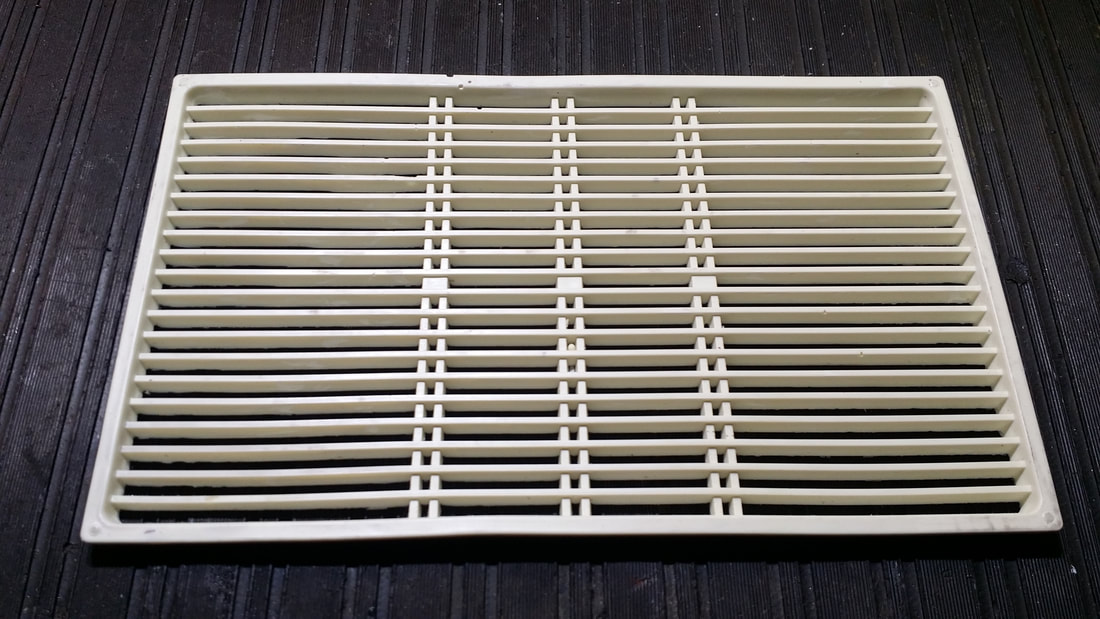
Bramar cabinet with the old finish removed. As with the chrome chassis, the cabinet was in really good shape, but, as with most things stored in a garage for years, the finish was poor.
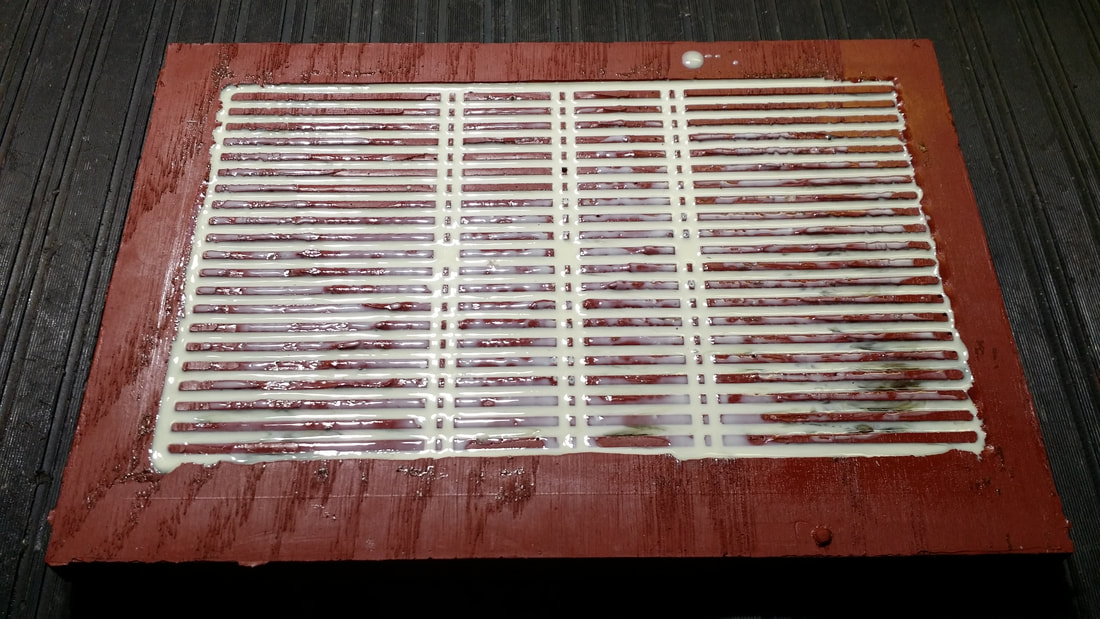
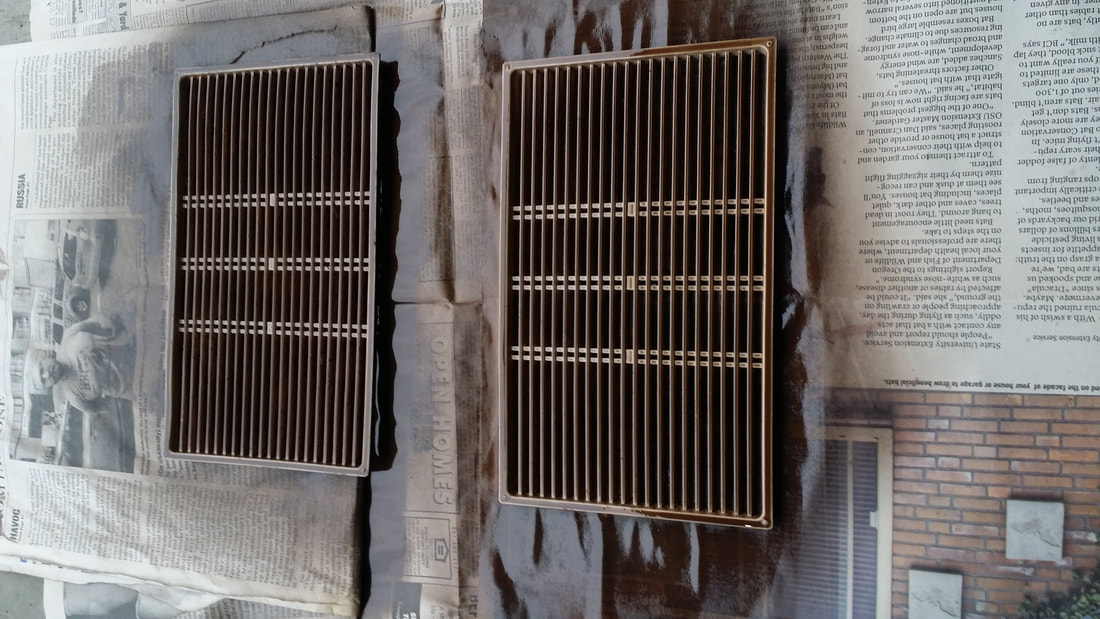
Picture
Sealer applied.
Picture
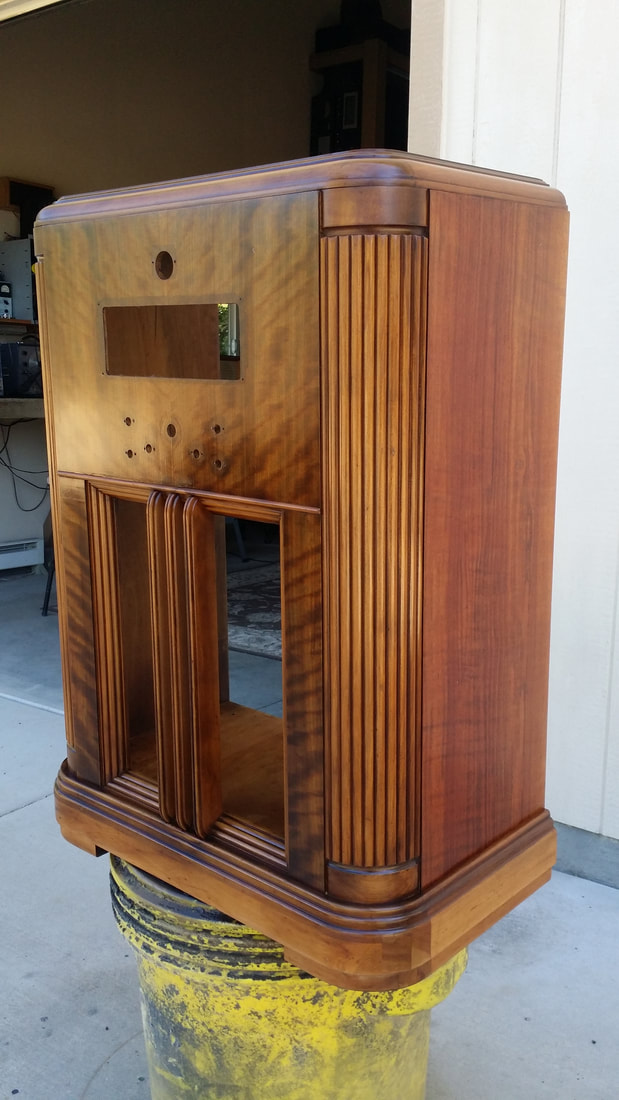
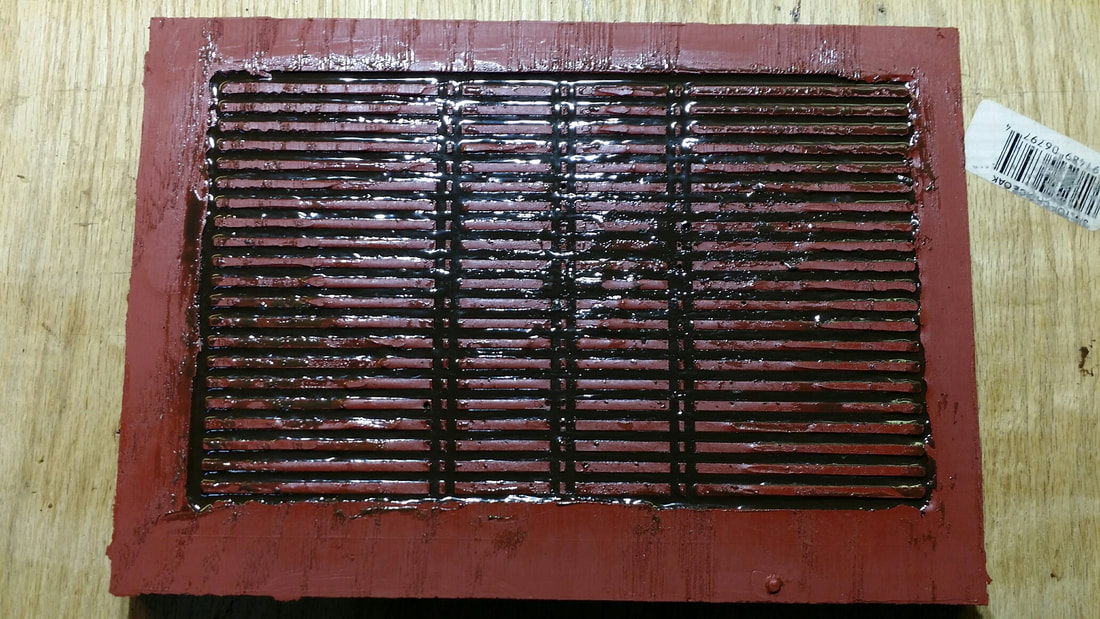
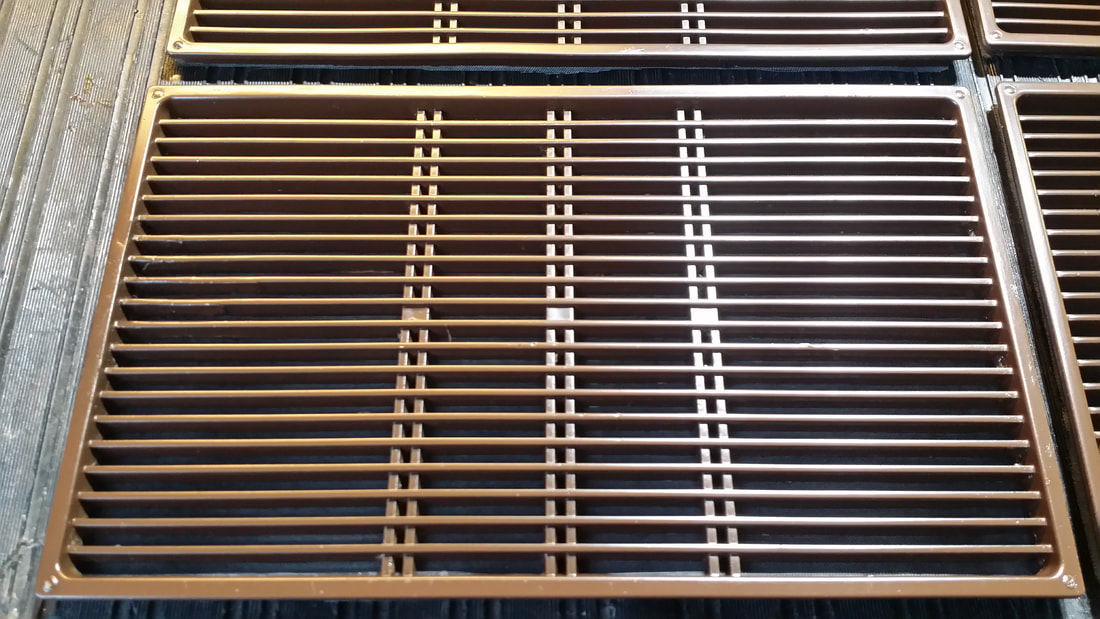
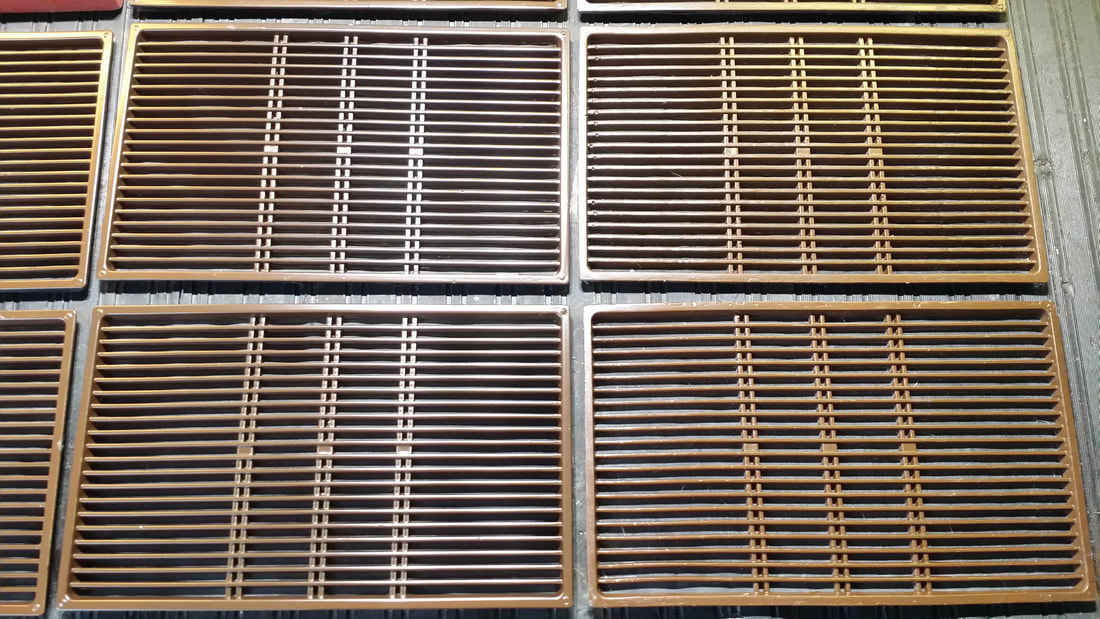
Toner added and the first topcoat. There are many versions of this cabinet as well as at least two finishes. One type has more toner for a darker finish. This is the lighter variety.

A darker version can be seen here:    ​https://www.russoldradios.com/blog/77-chrome-plated-rivets
Picture
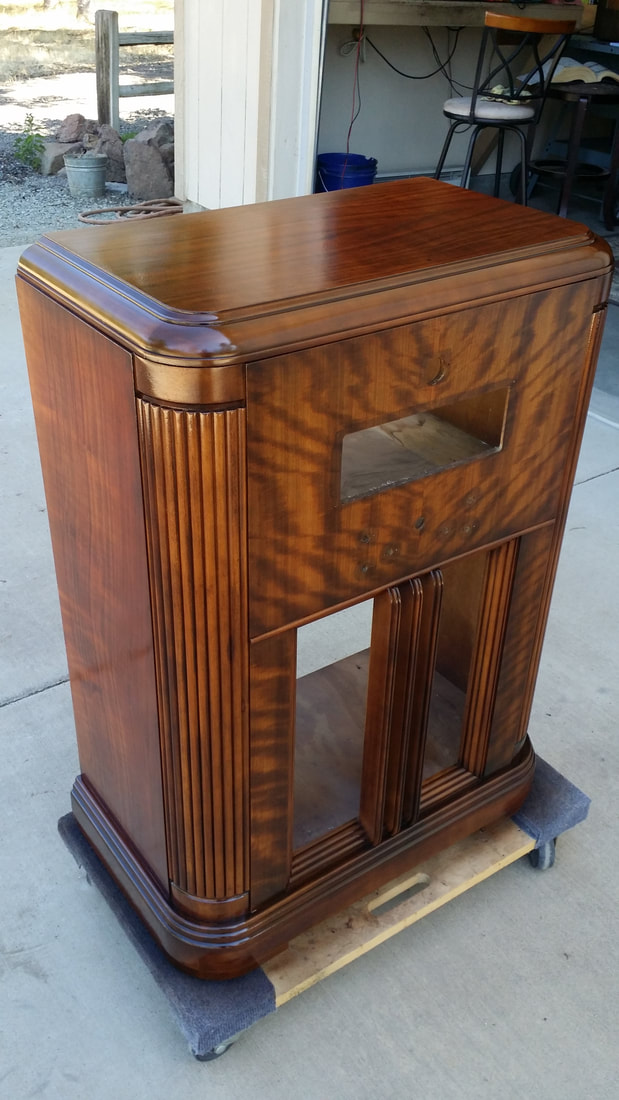
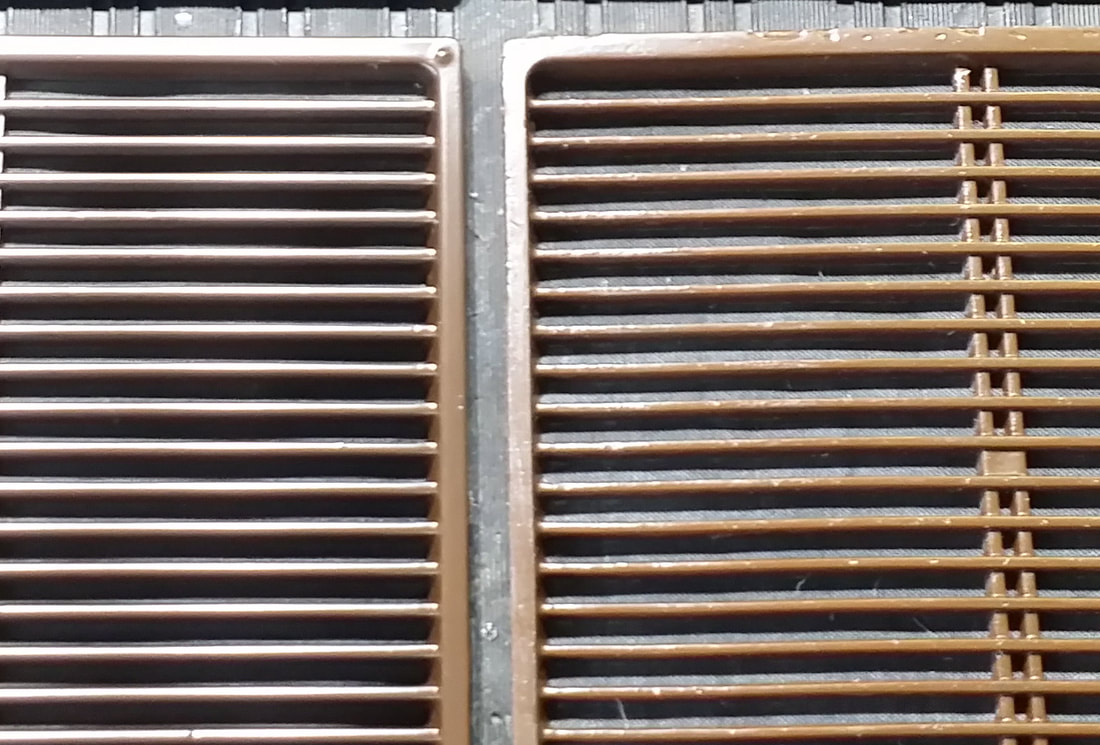
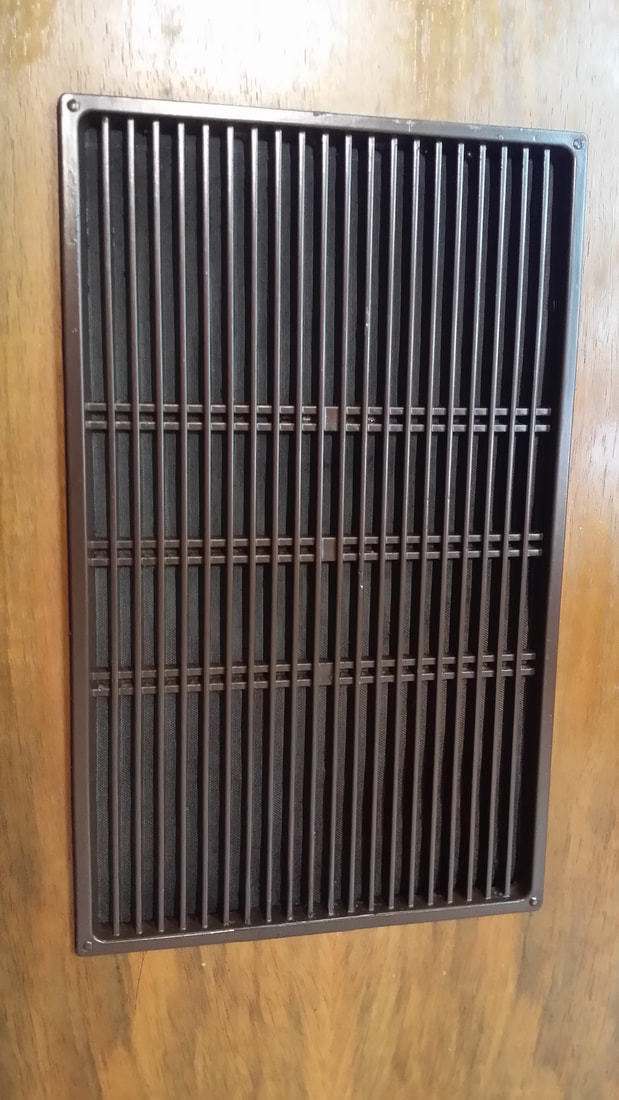
New grill cloth which is the old Grill Cloth HQ pattern (no longer available) and a new dial cover/lens which I fabricated on site.
Picture
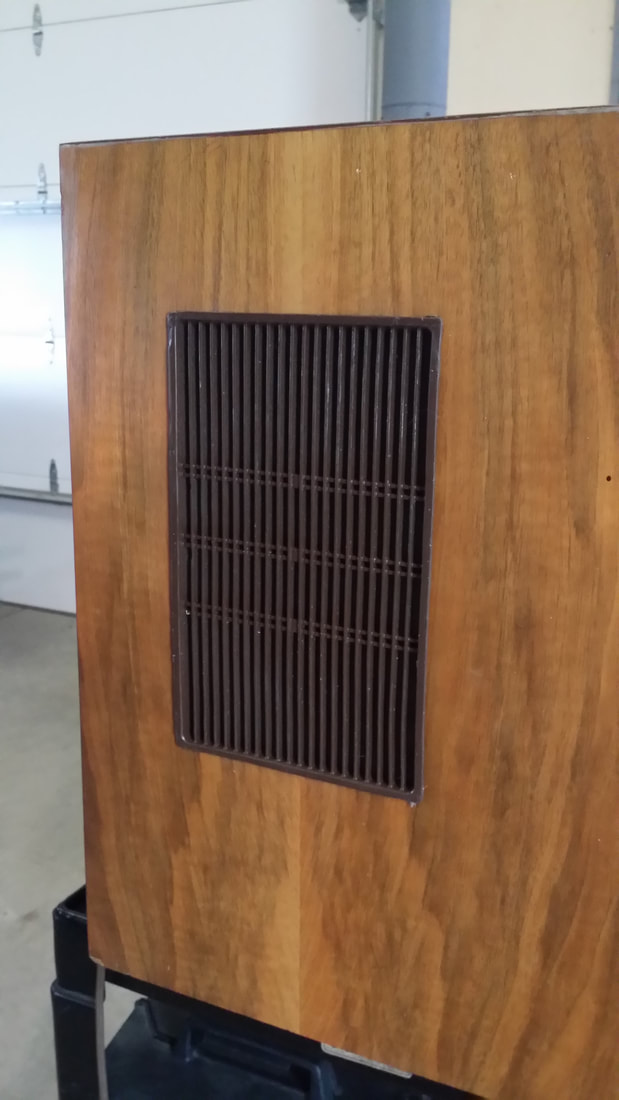
Almost makes you want to place the front side against the wall.
Picture
..
12 Comments

Grilling My  Saba

12/14/2019

5 Comments

 
 - - -Better living with chemistry from  Chef Russ.

The red goo was starting to get lumpy. Not much shelf life and too expensive to waste,  I needed to get this project finished before the cost went up.

​The  high-temp silicone molding material is always fun to work with, it seems to spread like some demonic force. No matter how careful I am it ends up on my tools and bench. It reminds me of the "Red Matter"from the Star Trek movie in which a very small amount was used to blow up a whole planet (Vulcan). Guess I better not drop any - ahh! Too late - - 
Picture
​Above: Original grill on rt. On left is a temp cover to prevent finger-damage to the speaker cone.

Going with what I have seen on my two radios, it appears that these models are often missing the speaker grills for the midrange speakers mounted on the sides. Of the 4 needed, mine only had one. Fortunately that one was in good shape and could be used to make a mold. 


Picture
The wooden box is used to form the red silicon mold. Some trimming  of the new mold may be required. Don't forget to  use a mold release agent. The side of the mold that you see was face down in the box/form.
Picture
Above is a grill-in-the-making. In this case I used resin. The advantages of using resin is that it is readily available at hardware stores and that it can be tinted (tints are not at hardware stores. Sometimes "plasticizers" are available but they are intended to make "gel-coat" and not what I use.)

The mix-ratio is variable depending on temperature and your desired set-time.

The biggest draw-back is the difficulty in removing bubbles from the viscous mix. The shorter the cure time, the harder this becomes. One advantage of using the high-temp silicone mold is the ability to warm the resin in the mold. This will shorten curing time tremendously and help to eliminate the sticky surface that often occurs when molding resin. It will also reduce the time you have to work out bubbles. I used heat from the wood stove to harden these after they had begun to set up. The silicone mold will tolerate about 600 deg F, The resin WILL NOT(!) I would not exceed 100 Deg, by much.

​I have had trouble with resin parts remaining soft for long periods. Using the correct mix and temperature will reduce this issue. Use the least amount of tint possible to achieve the desired color.
Picture
Above:  A resin grill in place. It is OK and looks good from a few feet away but it is rougher than I would have hoped (most people would not notice),

Picture
So I decided to  make a few more using 2-part polyurethane "Model Pro".

These came out of the same mold much cleaner with crisper detail and very few bubbles. But, as you can see in the "chemicals" picture below, the 2-parts, one clear and the other a greenish-brown, become bright white when cured. This stuff sets in 2.5 minutes and gets quite hot doing so. You have to work fast but the relatively thin mix allows bubbles to escape MUCH more easily. Using the high temp silicone is no worry for the heat produced. I would NEVER heat this stuff to cure and be aware that it can get VERY HOT all by itself.

Picture
A good mold release agent is recommended by the manufacturer. It will keep the new part from sticking to your mold. It may also cause paint to fish-eye and other adhesion problems.
Picture
Hint: Paint the white plastic grill with black lacquer first. Then follow with your custom-tinted, brown top coat.

Another issue with having to paint the grills is that "mold release agent" that I keep mentioning. It can really mess up your paint. The new part can have the characteristics of silicone contamination. I found that the hardened part is stable when exposed to lacquer thinner for a SHORT time. I used a shallow metal pan to wash the part. Thin areas of flashing will also become soft quickly so they can be brushed off rather than having to cut them off. The thinner can remove MOST of the release agent but be prepared for issues. Apply the black primer coat first and try to spray your paint on as dry as possible. I have not tried non-lacquer based paints.

P.S. I almost forgot to add, the black lacquer that I used was just out of a spray-can but the brown was applied with my sprayer, so I had the luxury of being able to add fish-eye reducer/flow-out to the mix. This was a big help in reducing these issues.
Picture
Above:  Painted poly grill
Picture
Poly and resin grills side-by-side. The colors are a match since I used the same tints in the resin that I  used to tint the lacquer paint.
Picture
Made in the same mold:  Left Polyurethane    Right Resin 

​The painted poly grill has a better finish than the resin grill.
Picture
New Grill installed in the Saba 400. These were a friction-fit with maybe a little glue around the edge. It is possible that those that were missing simply fell out of the hole  in contrast to the brittle/distorted plastic failures seen on earlier parts. Evidence for this is the  good condition of the single remaining original grill used in the mold.
Picture
Some, but not all, of the chemicals used.

​Wear your protection - -

This is obviously not a kitchen project. If you want to give this a try make sure that you have a well ventilated and suitable place for the project. Wear protective gloves and clothing . Read and follow label instructions - and don't yell at me if you get red goo all over the place.

I would estimate the cost of the pictured chemicals at about $200.
Picture
Label on the shore 60 silicone "Limited Shelf Life". I would not count on this stuff remaining viable for more than a year. Unlike many two-part solutions, close is really not good enough for mixing in the hardener. A person really needs a scientific scale to get the 100 to 3 mix ratio correct.

With many of these projects, I am asked  if I will be selling these parts. No. I have too many other projects. Of course, if you would like to install the hydraulics on the tractor for the new backhoe, I'll make you a pair of grills. Otherwise, that is what I will be doing for the next few days ;-)
5 Comments

    Author

                         Russ Webb

    Picture
    Russ Webb & Fuzzy

    Best Buddy, Radio fixer


    Categories

    All
    All
    Antiques
    Electronics
    Radios
    Repair
    Restoration
    Travels
    Vintage

    RSS Feed

    Archives

    March 2025
    November 2024
    December 2023
    March 2023
    November 2022
    October 2022
    July 2022
    January 2022
    December 2021
    September 2021
    June 2021
    April 2021
    February 2021
    January 2021
    November 2020
    July 2020
    June 2020
    April 2020
    March 2020
    December 2019
    October 2019
    May 2019
    April 2019
    March 2019
    February 2019
    January 2019
    December 2018
    November 2018
    October 2018
    September 2018
    June 2018
    April 2018
    March 2018
    February 2018
    January 2018
    December 2017
    November 2017
    September 2017
    June 2017
    May 2017
    April 2017
    February 2017
    December 2016
    November 2016
    October 2016
    September 2016
    August 2016
    July 2016
    June 2016
    May 2016
    April 2016
    March 2016
    February 2016
    January 2016
    December 2015
    November 2015
    August 2015
    June 2015
    May 2015
    April 2015
    March 2015
    February 2015
    January 2015
    December 2014
    November 2014
    October 2014
    September 2014
    August 2014
    July 2014
    June 2014
    May 2014
    April 2014
    March 2014
    February 2014
    January 2014
    December 2013

CUSTOM DESIGN BY SUE WEBB  06/2013       Redesigned by Russ Webb     Approved by Fuzzy   Updated:  Pretty much all the time, but I forget to change this date
Proudly powered by Weebly
Photos from valart2008, rafeejewell