
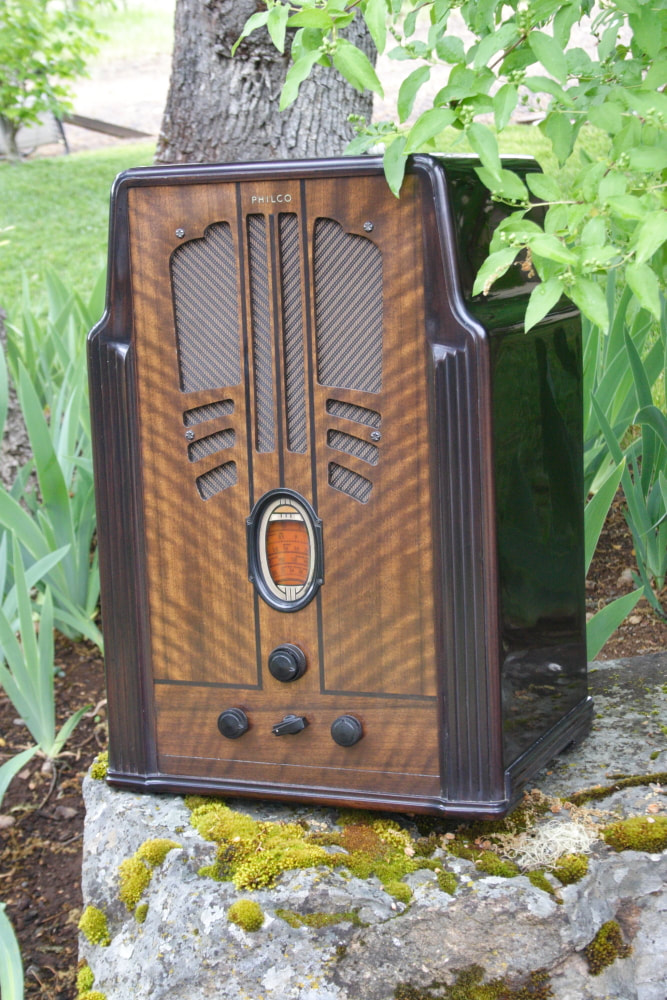
I have really never liked this cabinet design. It could have been more appealing if the colors/veneers were different - and the shape was less of a tombstone, cathedral compromise. But they did not ask me. I can see where they were going, kind of a "what's next" following a very attractive and successful cathedral marketing campaign. And, yes, I really like the 16 cabinet.
There is reason to believe that others shared my view of the cabinet since a mid-production change resulted in a more conventional (yet bland) tombstone cabinet design using the same chassis with minor updates. However, the 10" speaker was reduced to a 8" version.
Well, cabinet aside, the 116B is an impressive radio for the time, which was more or less, 1936.

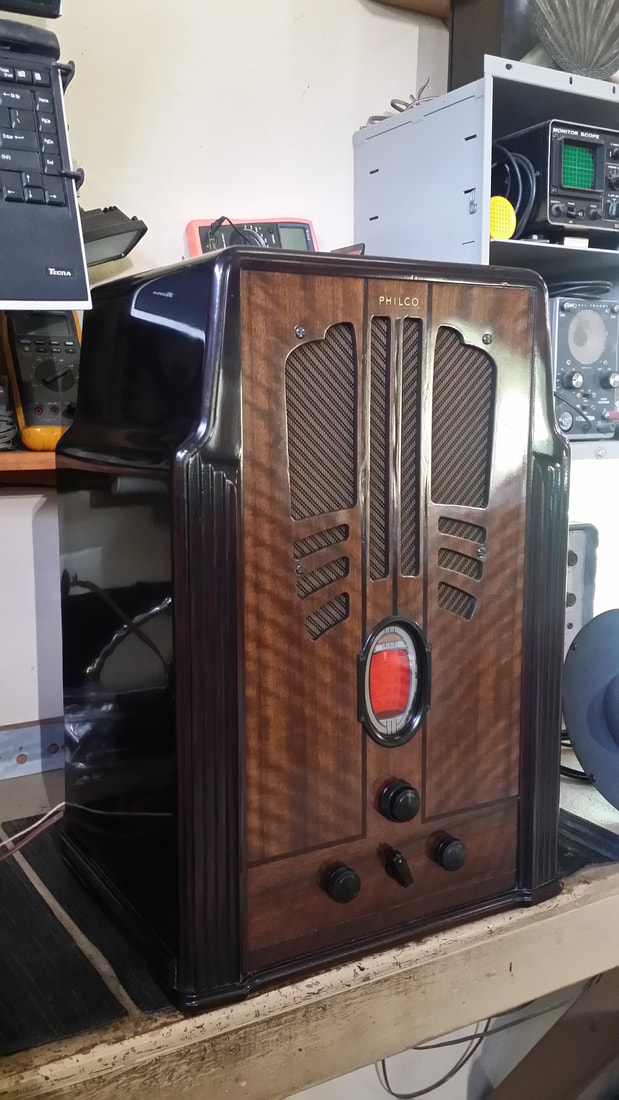
As-Found on local CL for $35
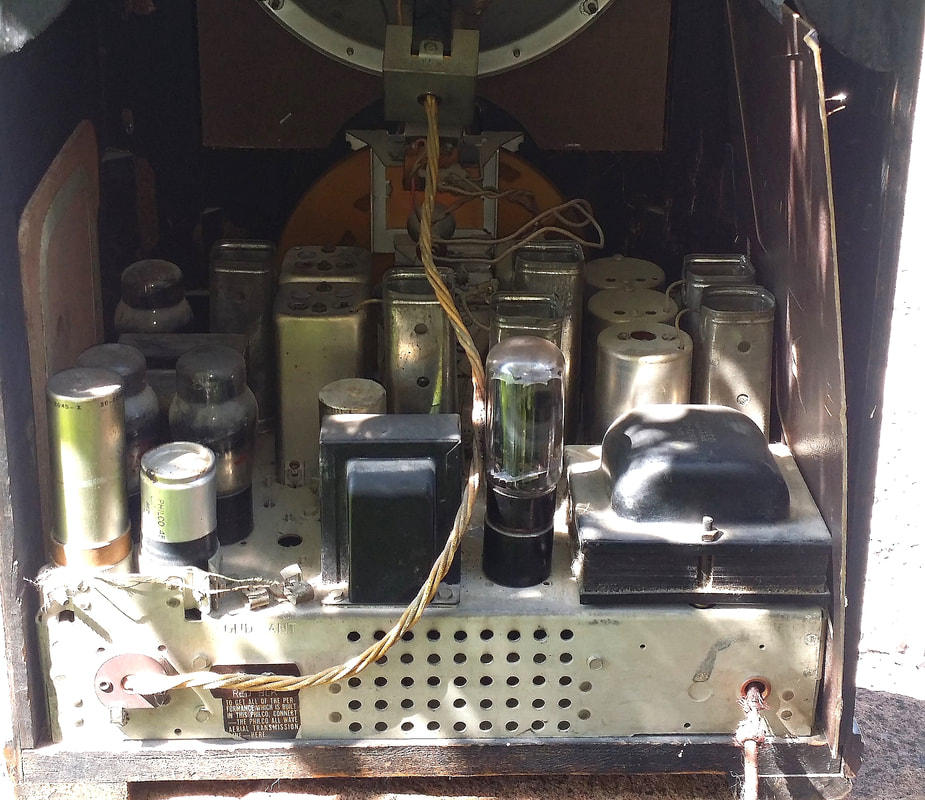
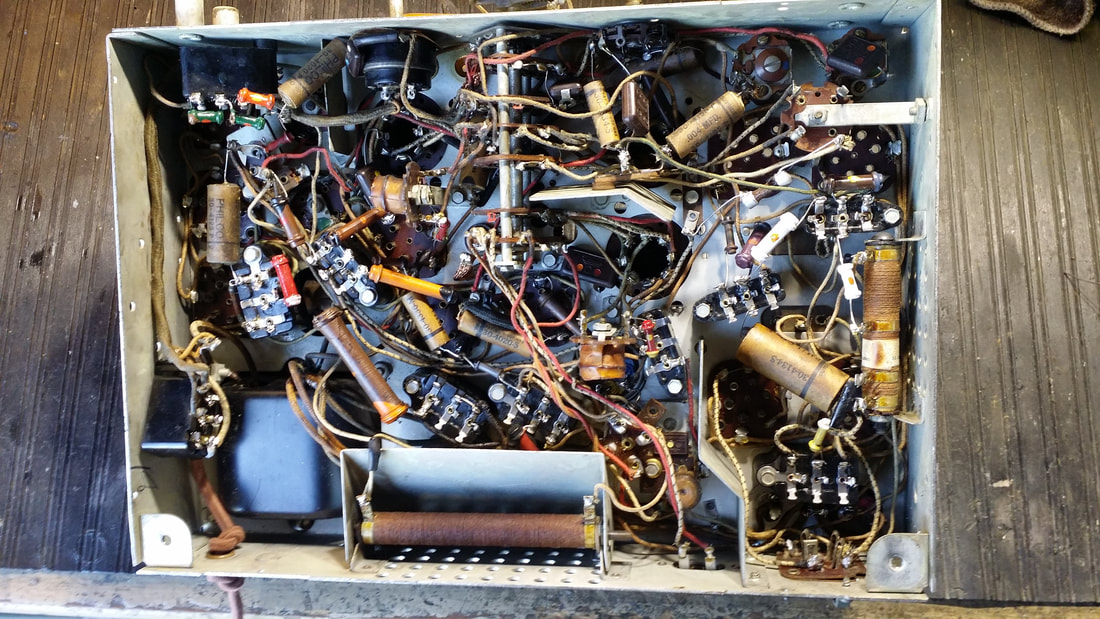
This is an 11-tube radio with an RF amp and 2 IF amps, all of which are 78s. I would compare it very favorably with any 12 tuber since the 12th tube in many designs was an eye-tube (signal indicator) which in the Philco is replaced with a Shadow-Graph which is superior in the sense that all eye tubes suffer from short life - possibly a year in regular use. Where as the electro-magnetic shadow-graph is still good 83 years later. A shadow graph is basically a standard meter movement where the pointer is replaced with a "vein" that covers and uncovers a bulb as signal increases.
This is an 11-tube radio with an RF amp and 2 IF amps, all of which are 78s. I would compare it very favorably with any 12 tuber since the 12th tube in many designs was an eye-tube (signal indicator) which in the Philco is replaced with a Shadow-Graph which is superior in the sense that all eye tubes suffer from short life - possibly a year in regular use. Where as the electro-magnetic shadow-graph is still good 83 years later. A shadow graph is basically a standard meter movement where the pointer is replaced with a "vein" that covers and uncovers a bulb as signal increases.
The cabinet and chassis were in great shape. Unfortunately the very dark colored cabinet section shows every abrasion and mark even in dim light.
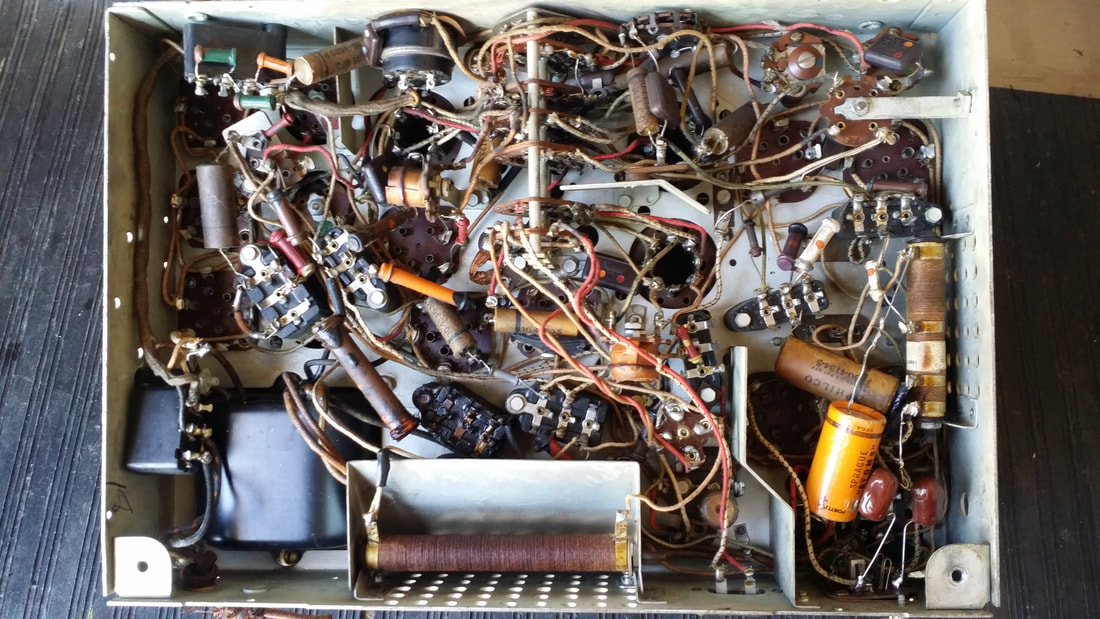
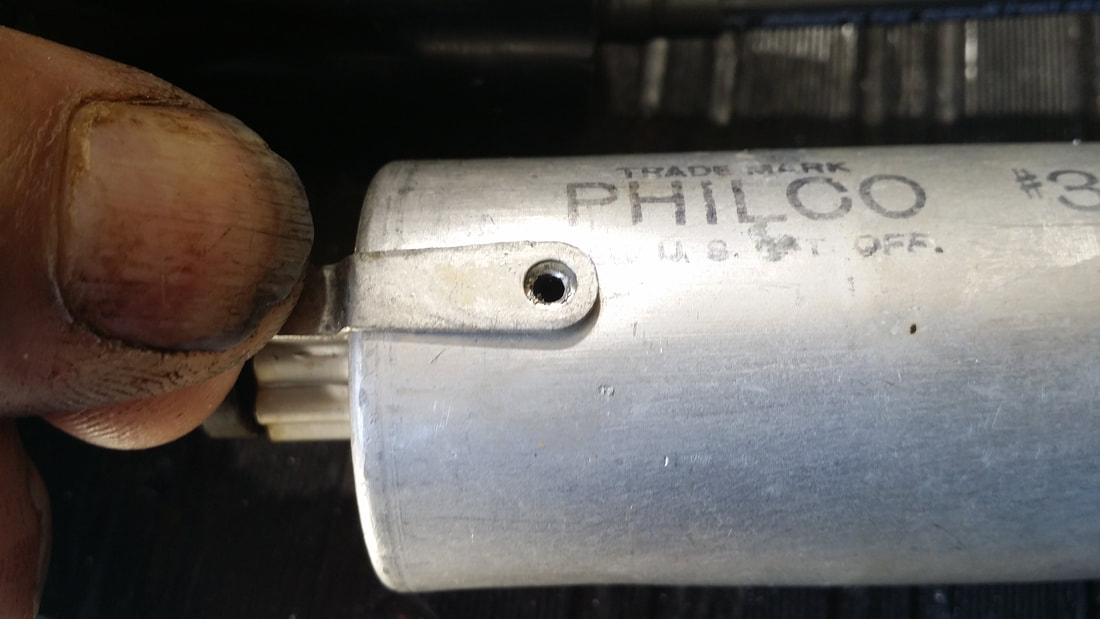
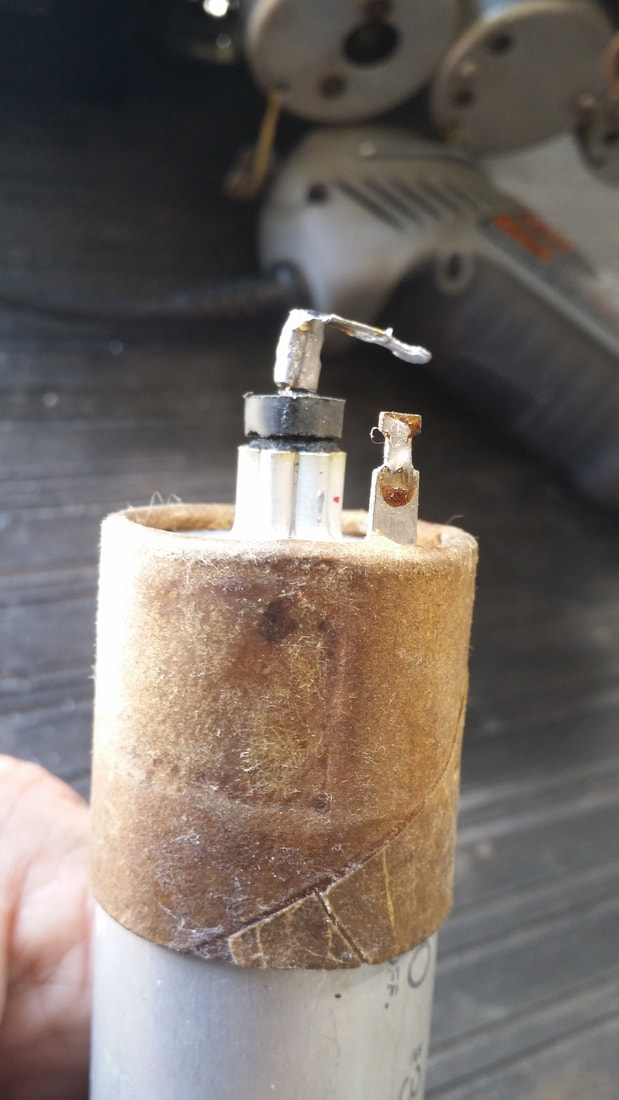
There were only a few replacement parts. Note the yellow cap in the lower right - a typical replacement for the short-lived "wet" electrolytic filters. One of the original can-caps was still present. I found an exact replacement for the missing can in the parts-stash and began the process of rebuilding or "stuffing".
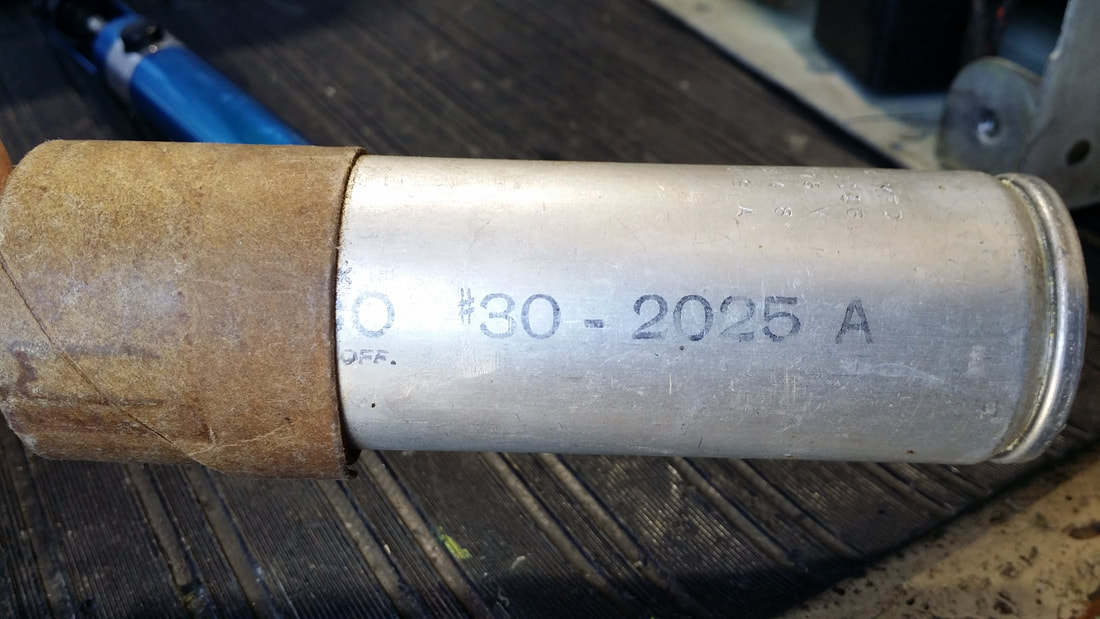
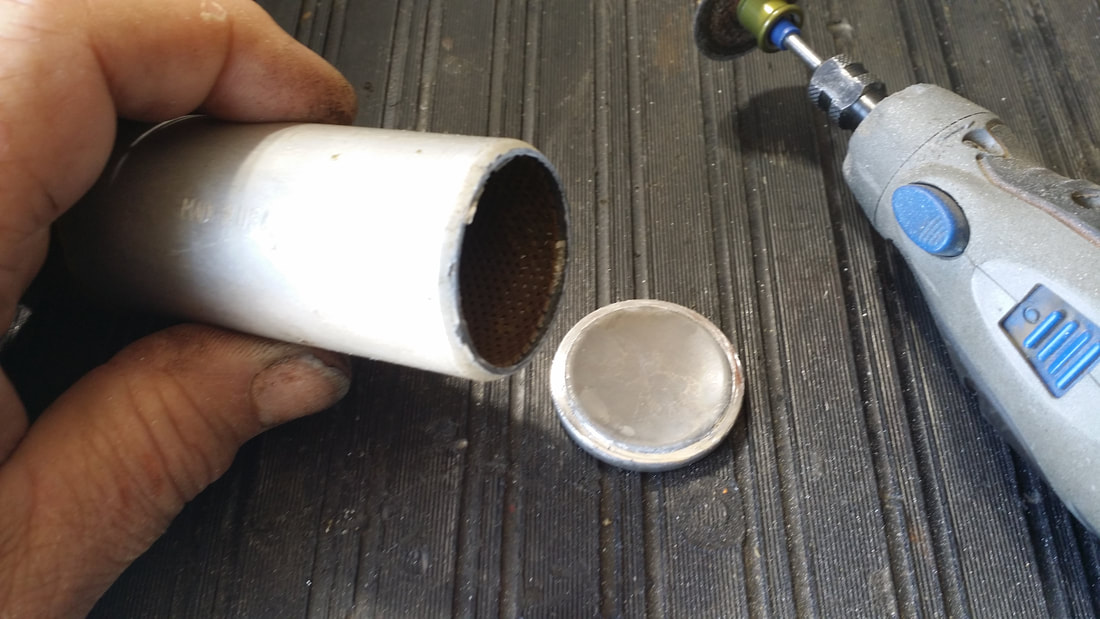
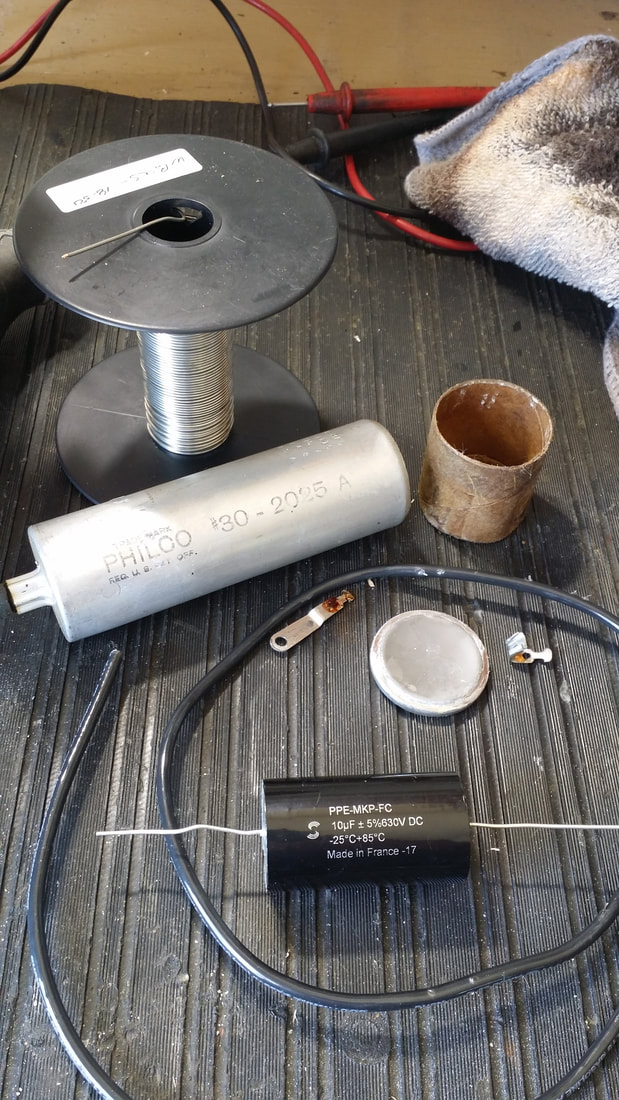
Note that the replacement cap is a 630V 10uf film cap. (metalized Polypropylene) not an electrolytic with an expected durability/lifetime benefit.
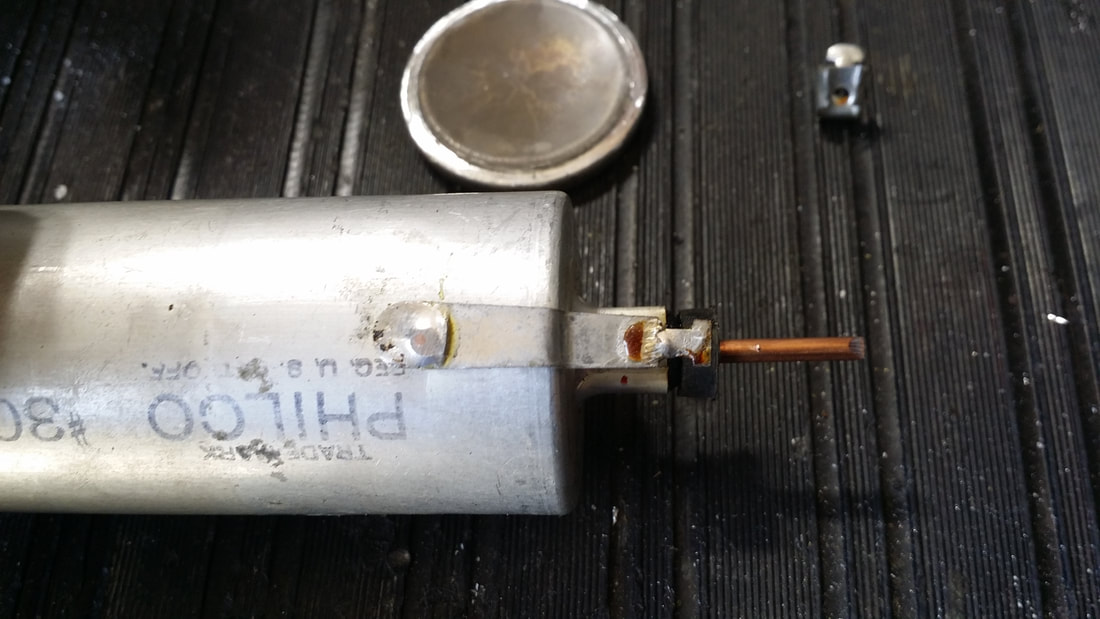
Yes, the + stud/lead is a piece of Romex (TM) with its own insulation which assists in insulating the B+ if the original rubber insulator is degraded or missing.
Filters done, time to do the rest of the caps and make replacements (molded) for about half of the original resistors. This process is discussed in earlier posts. Additionally, all rubber mounting components are replaced.
Chassis ready to go, now on to the cabinet.
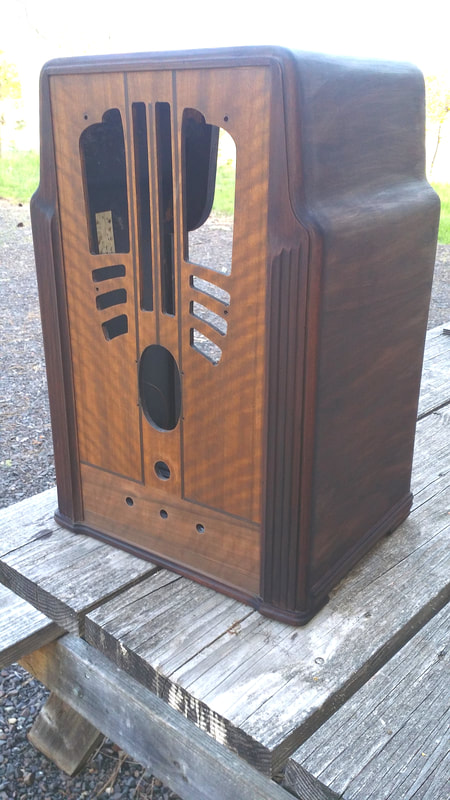
Above: I have had to adjust the brightness of this exposure to assist in illustrating the process. The really dark cabinet is difficult to display accurately in a photo and is greatly affected by the intensity/brightness/direction of the illumination.
Have you ever noticed that, following the removal (stripping) of the original finish, there is still an artificial tone to the wood? I believe. with pretty good certainty, that many manufactures used both toner and dye to tint their cabinets.
Chemical stripper usually leaves the tint created by dying the wood behind, but sanding can remove most, or all, of it. Above, the cabinet has been stripped and several coats of dark walnut dye have been applied to the trim and arch.
Don't confuse "dye" with stain. They are not the same.
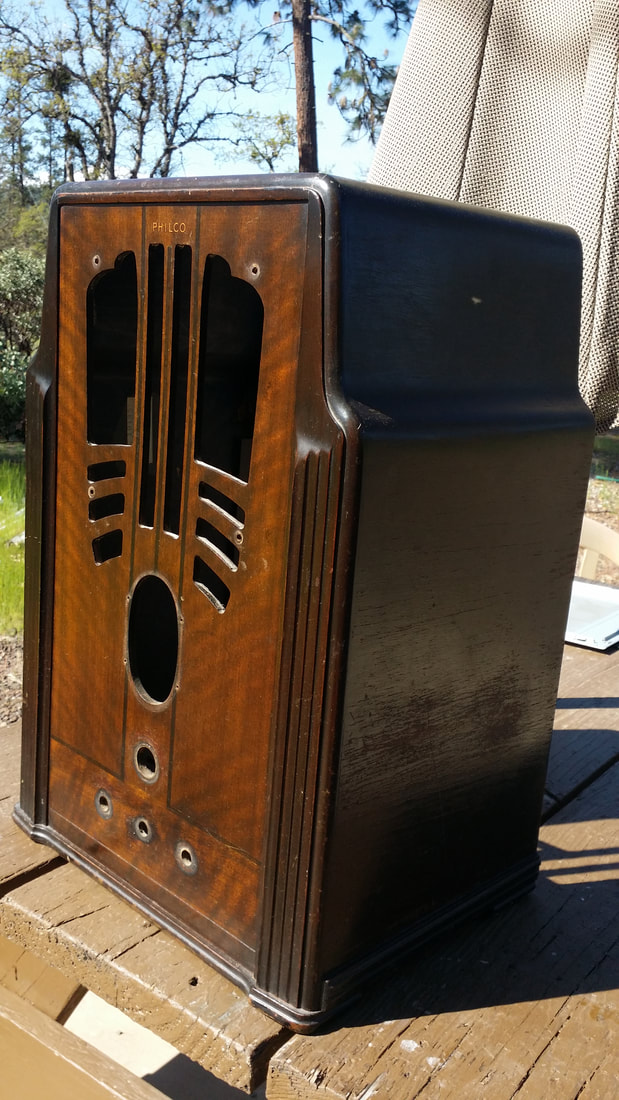 |  |
As I said, taking a picture of a surface that is this dark with enough light to show the tint is tough. In the pictures above, the picture on the left is as-found and the picture on the right is after dye, toner and a top coat. Pay attention to the areas in direct sunlight and you (might) see that the finish as a VERY dark reddish-brown (very dark walnut).
You might also ask - why did he refinish that radio? Well, the problem with the photos also hides the issues with the dark cabinet. When I first looked at the radio in a moderately well lit room I thought that I would not have to refinish. But once the radio was well lit the stains (top) scuffs and scrapes were painfully clear.
You might also ask - why did he refinish that radio? Well, the problem with the photos also hides the issues with the dark cabinet. When I first looked at the radio in a moderately well lit room I thought that I would not have to refinish. But once the radio was well lit the stains (top) scuffs and scrapes were painfully clear.
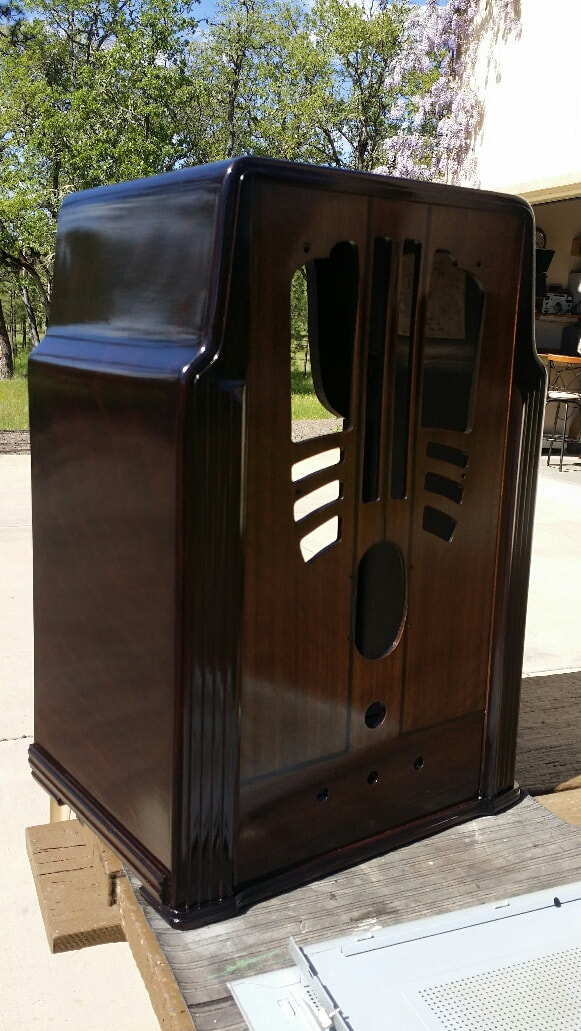
My first instinct was to tone the dark areas with Dark Vandyke Brown. I often use this toner on trim that appears black. VD Brown is a great color - when used in moderation or on small surfaces. But when applied heavily on large surfaces it takes on a greenish cast that I find disagreeable. (keep in mind that applying SO MUCH of any toner that any and all "highlights" are covered up is generally wrong - or at least inconsistent with the way it was originally done). If the original toner did have the greenish cast it may have been moderated by the yellowing of the top coat, but, I think that the tint(s) used in the 1930s were slightly different than those available today.
So, what I did was mix up some lacquer with the Extra Dark Walnut dye as a tint. I also modified the lacquer topcoat so that it is closer to semi-gloss than full gloss, but(!) after a week it was buffed out. The large dark area also was the cause for modifying the gloss.
I would have to see many more examples of original finishes to modify my color scheme but for now, this is my conclusion.
Like I have said - I need a BIGGER bench!
Following alignment I found this radio to be very capable. The only issue I have with it is minor. When aligned as per the instructions I find that the top end of the broadcast band is SO hot that a long antenna just swamps the receiver. Actually it receives all of the local station with no antenna at all. My first instinct was to detune the IF slightly but this would affect short wave performance too. So I decided that a moderately sized antenna was a better solution, switching to a longer one for DXing on SW. Another thing that occurred to me was to peak the broadcast band near the center rather than the top as is generally done. As-is the over-driven phenomena is limited to 1.2mhz and above. There are two tie-ins to this , one being the shadow meter which is very responsive on the upper BC band and X-band and less so elsewhere and the X-band is also very hot, though listening there is limited mostly to beacons and such - nice beat, but vey repetitive. One other note in this respect is the option to add Philco's loop antenna to the connections provided for it. I would assume that this would reduce the issues found with a long wire. I don't know how well it would work for short wave.
In conclusion, this is a very capable radio comparing well with other 11 and 12 tube radios of the time - I guess that I'll get used to the cabinet design - maybe.
P.S. Get someone younger to lift it onto the bench.

 RSS Feed