
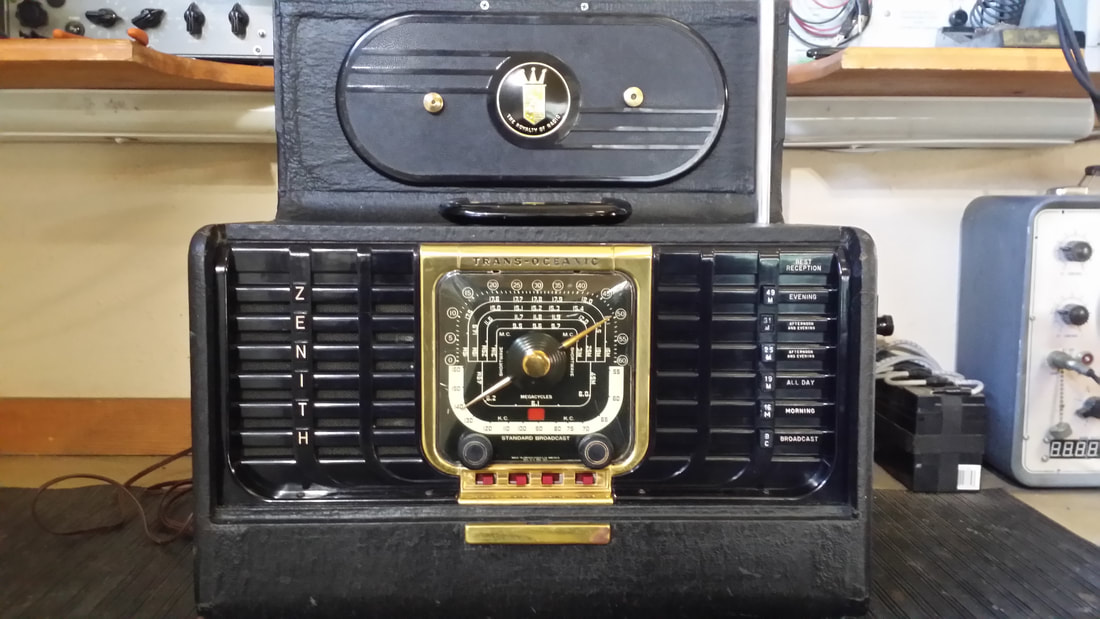
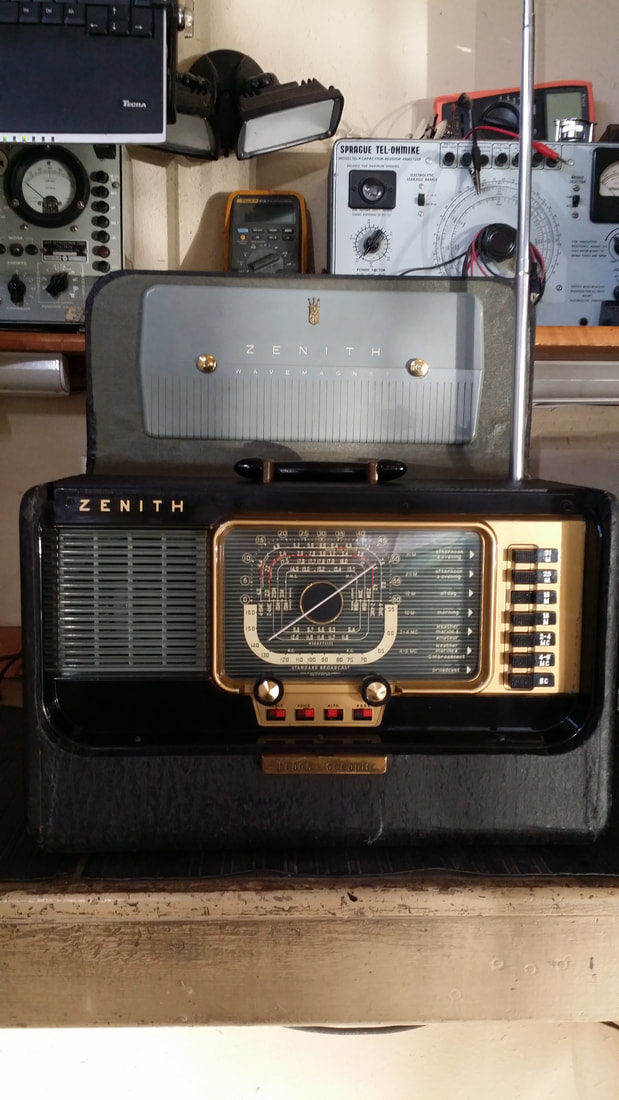
The Zenith TO is a Classic regardless of model. The black vinyl covered box is not particularly attractive. You never hear of them being described in terms used for 1930s wooden cabinet radios. I don't think I have ever heard one described as Art-Deco or any of the other common (if still incorrect) terms used in for-sale ads.
No, the attraction to this radio is much more utilitarian. First it was truly portable containing both batteries and adequate antennas. It was compact for the time. And, most of all, It worked well, really well considering that later models used only 5 tubes. To me, this attraction is more like that associated with some of the early tube testers and other test equipment. This is not the kind of radio that looks good displayed on the fireplace mantel, yet, no collection is complete without one.
What?! Did I just say that no collection is complete without one? Well , I guess that I am going to have to figure out what to do with these.
Above is a G500, the first model to use 5 miniature tubes
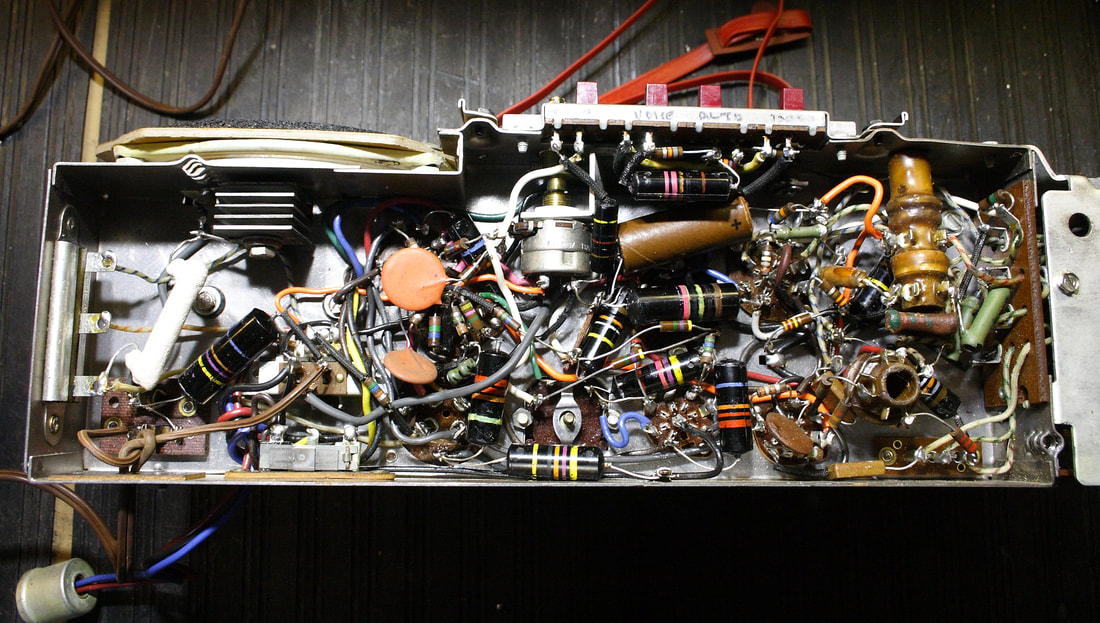
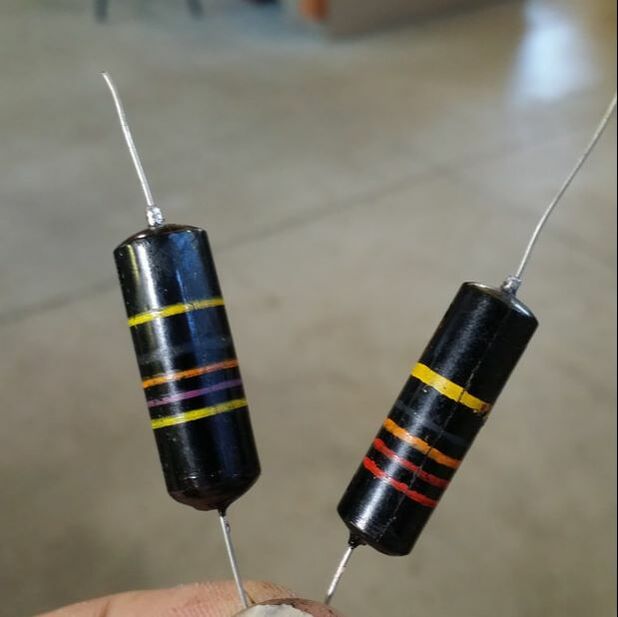
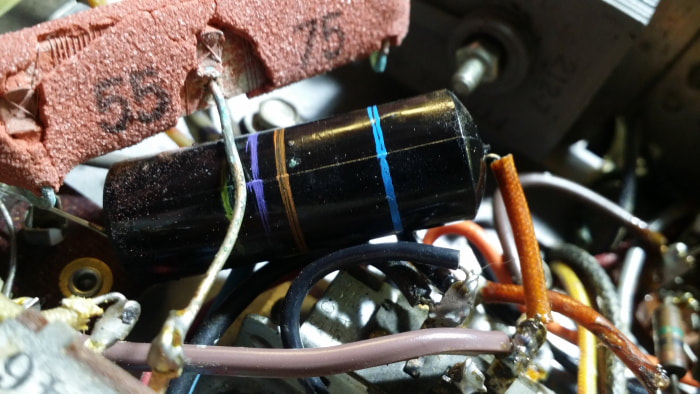
Black-Beauties/Bumblebees, probably one of the worst mass-produced capacitors of all time, are a common issue for post-war radios. It is a generally accepted belief that they can not be re-stuffed (rebuilt) and therefore any restored radio that had been constructed using them will inevitably turn out looking like the "before" example, two pics below.
Black-Beauties/Bumblebees, probably one of the worst mass-produced capacitors of all time, are a common issue for post-war radios. It is a generally accepted belief that they can not be re-stuffed (rebuilt) and therefore any restored radio that had been constructed using them will inevitably turn out looking like the "before" example, two pics below.
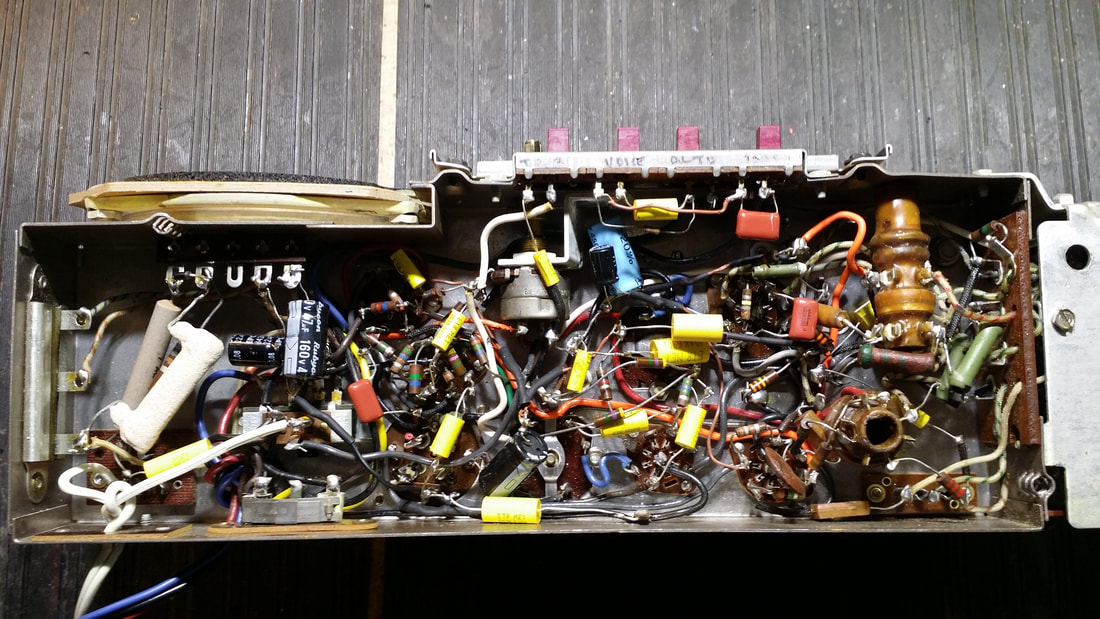
After: Restoration including the rebuilding of numerous Black-beauty capacitors.
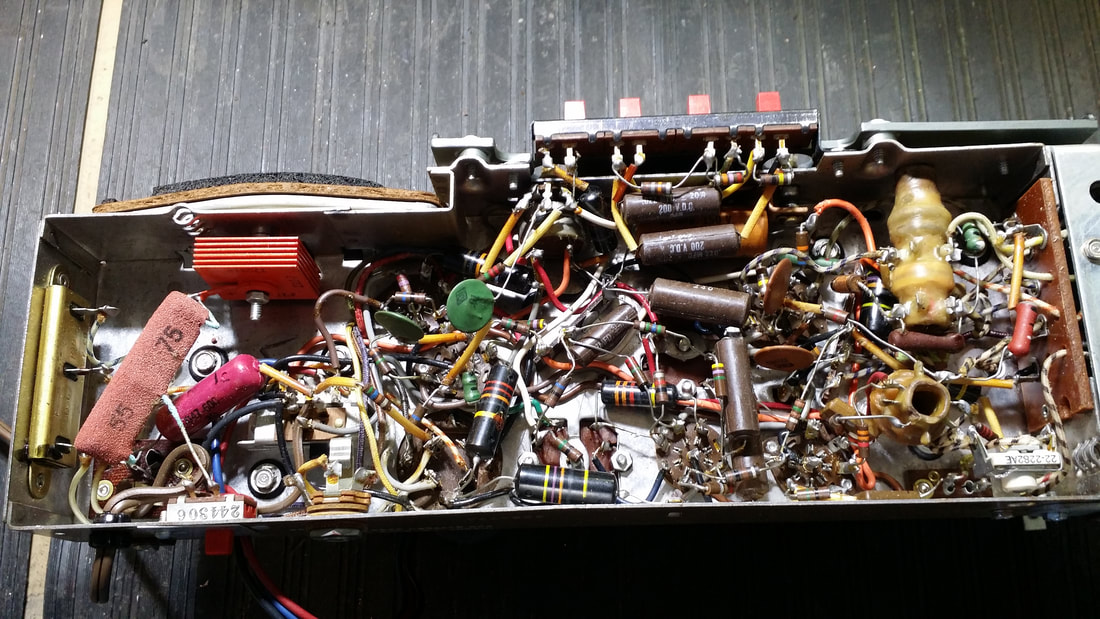
Before: A previous repair which used twisties to avoid cleaning posts, filters mounted under the chassis, rather than restuffing the electrolytic can(s), flying connections (at least 1 miswired), several varieties of modern capacitors and resistors, and a lot of singed/burnt plastic insulation on wiring.
Having said all of the above, this is still a pretty standard repair ("restoration").
This is why these radios have been sitting around for so long. Even though this example was working, I had considered giving it away or just throwing it out since it did not meet the standards set for the rest of the collection. Selling it to some unsuspecting CL buyer was out of the question. Note as well, that both locating original parts and correct placement was going to be a real challenge.
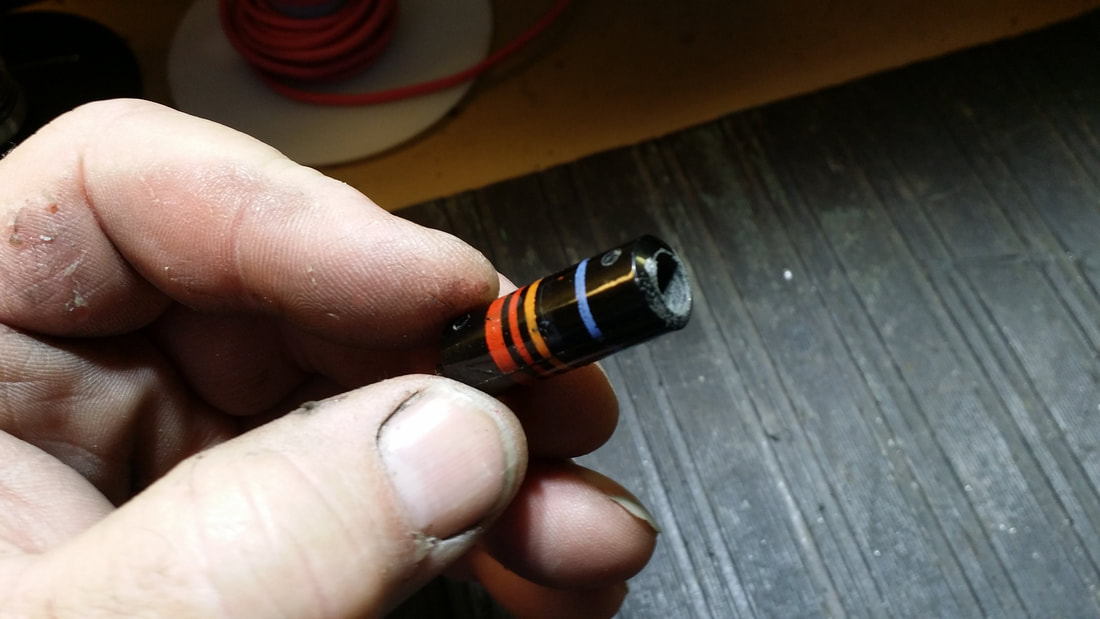 | 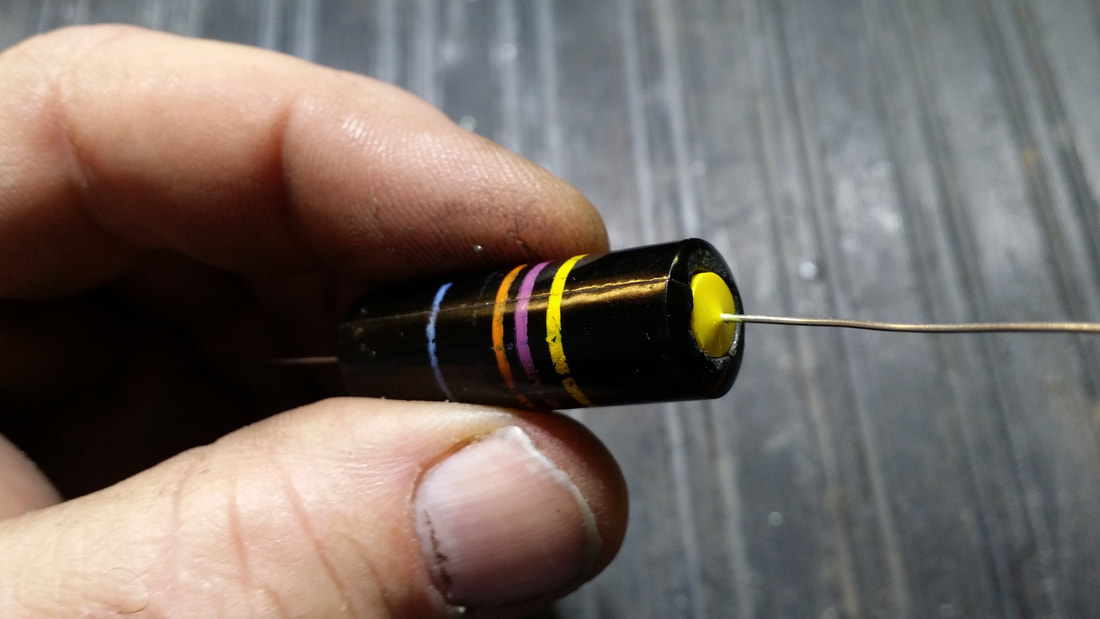 |
What I needed was a way to restuff existing, original caps or create new replacements with that vintage look. Above you will see option 1 - restuff the original Black-Beauty caps.
No special tools are required. All you have to do is line-bore the original cap. You can do this with a drill press or just a hand-held drill. What's important is:
Holding the cap securely without crushing it (it becomes weaker as the material inside is removed).
Drill speed, so it does not bind or get too hot.
Maintaining the Z axis (in a strait line).
Making the hole big enough to accommodate the new cap.
Any failure to maintain the 4 conditions listed above will result in a broken/crushed housing, which, if minor, can be repaired with super glue, but further machining will be difficult if the integrity of the tube is compromised. EASY!
 |  |
| Later 5-tube chassis | Early 8-tube chassis (loctal W/rectifier) |
An H500 TO looks very similar to the G500 though one uses a 5-tube chassis and the other uses the 8-tube chassis.
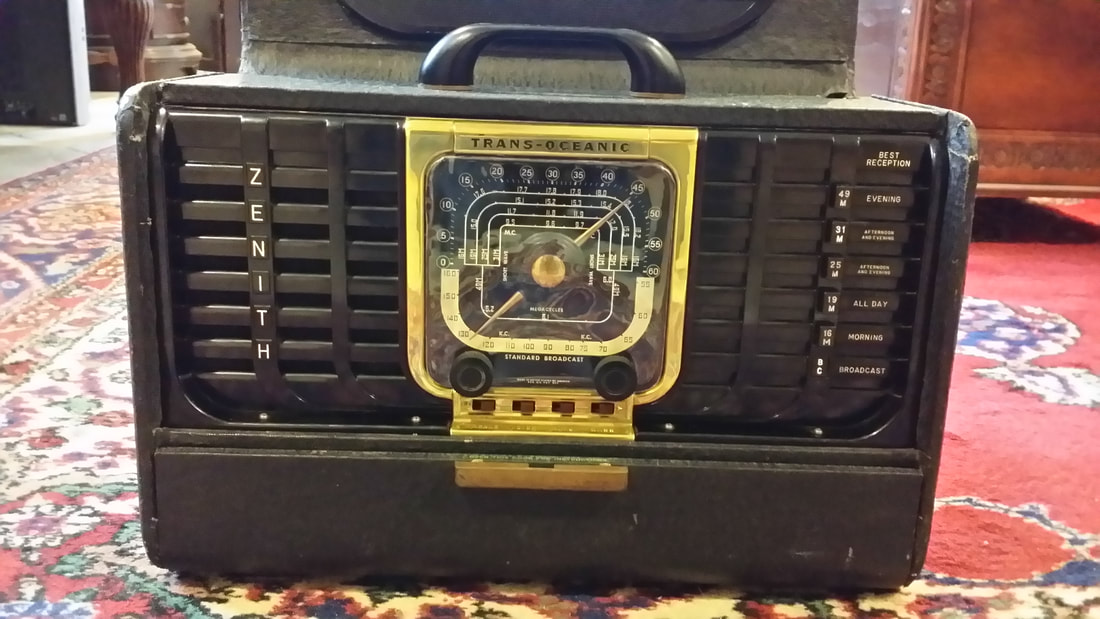
Above is an A600, one of the last versions of tube-type Transoceanic.
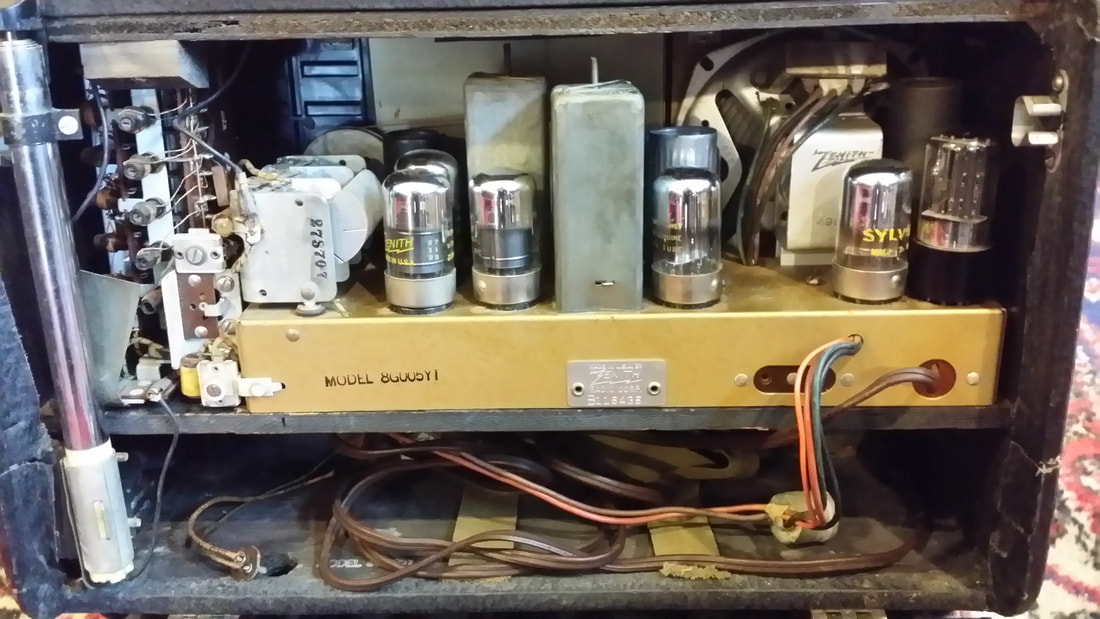
Above is the restored A600 chassis.
 | 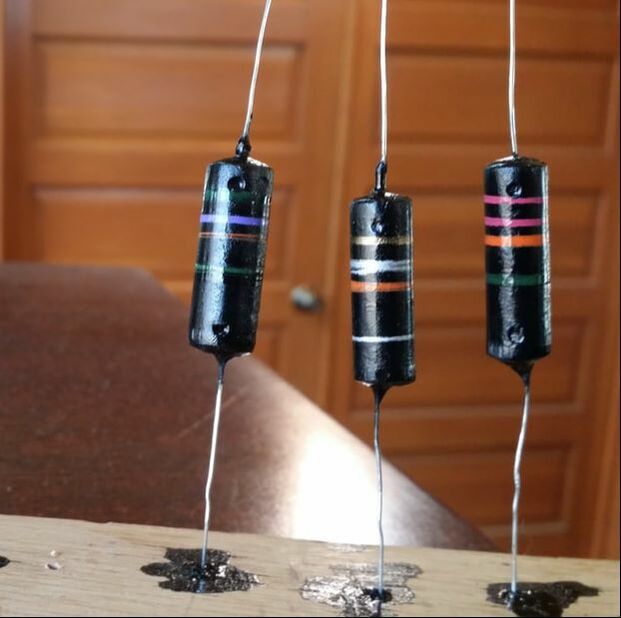 |
| Restuffed Black-Beauty Caps with the original markings but now rated for 630 volts (the yellow 400 V mark/ring is retained) | OPTION 2: New cast (resin) Black-beauty replicas which are also rated at 630V. Marking the values/rings is easy in a drill - getting the colors right is tougher. |
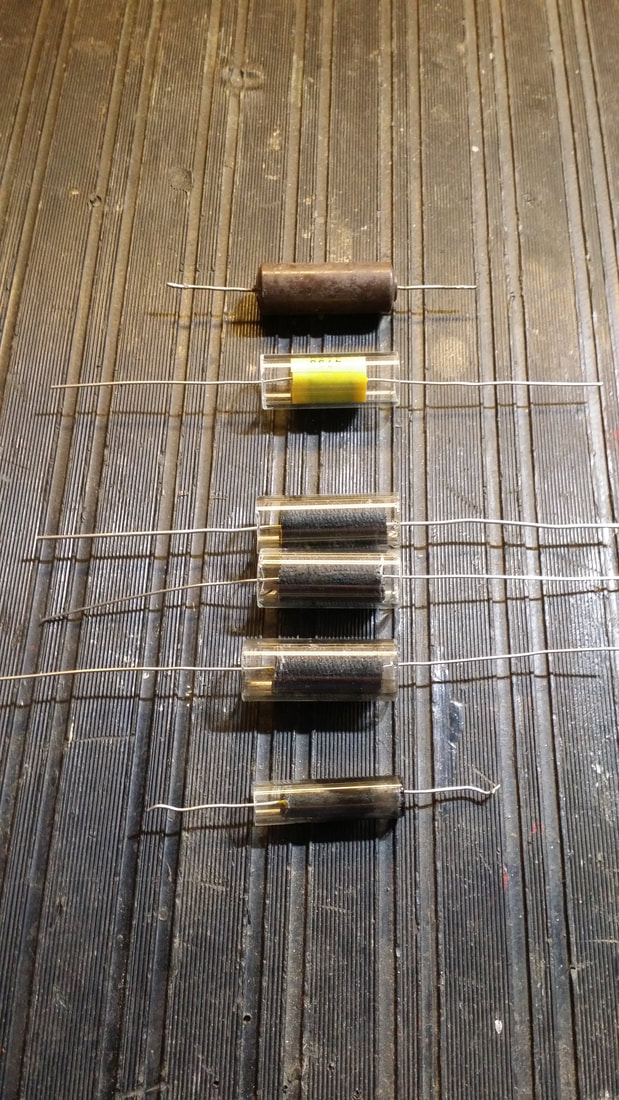 |    |
| Option 3: New Bumblebee replicas built with glass-tube body. Different diameter glass tubes must be cut to length. | Above is a mold used to cast resin replacement caps. These could be any color so a green Tobe or other make/type is also possible. |
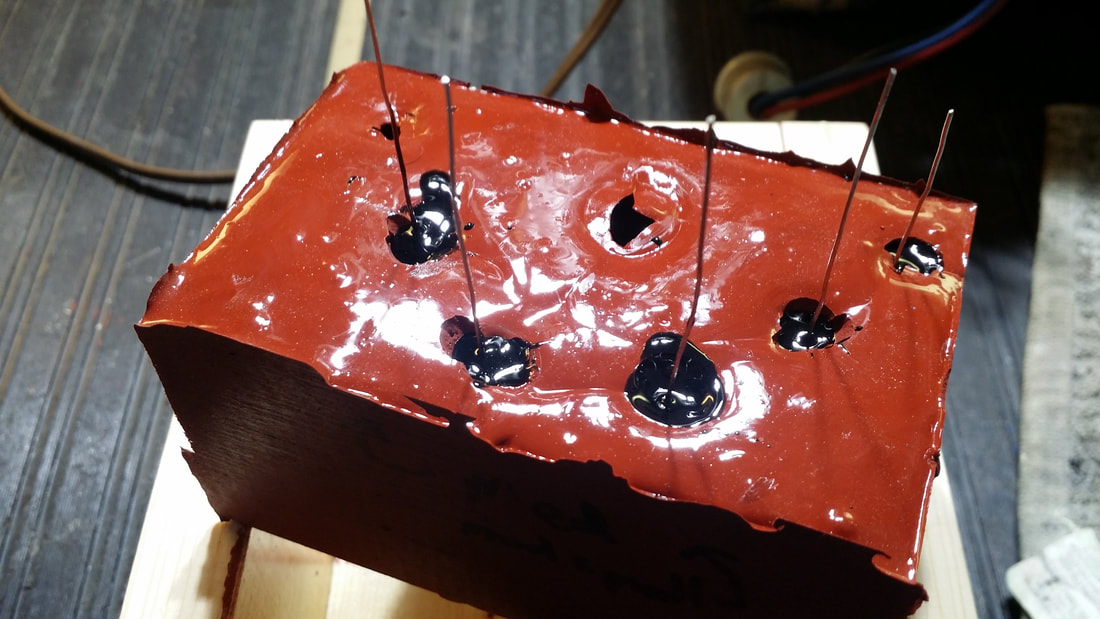
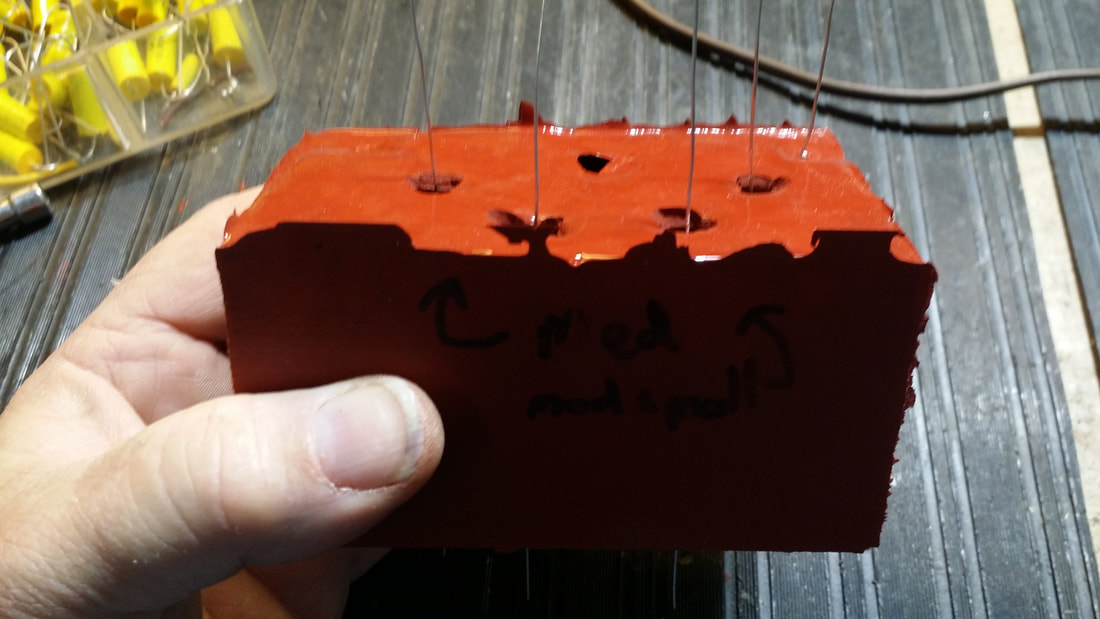
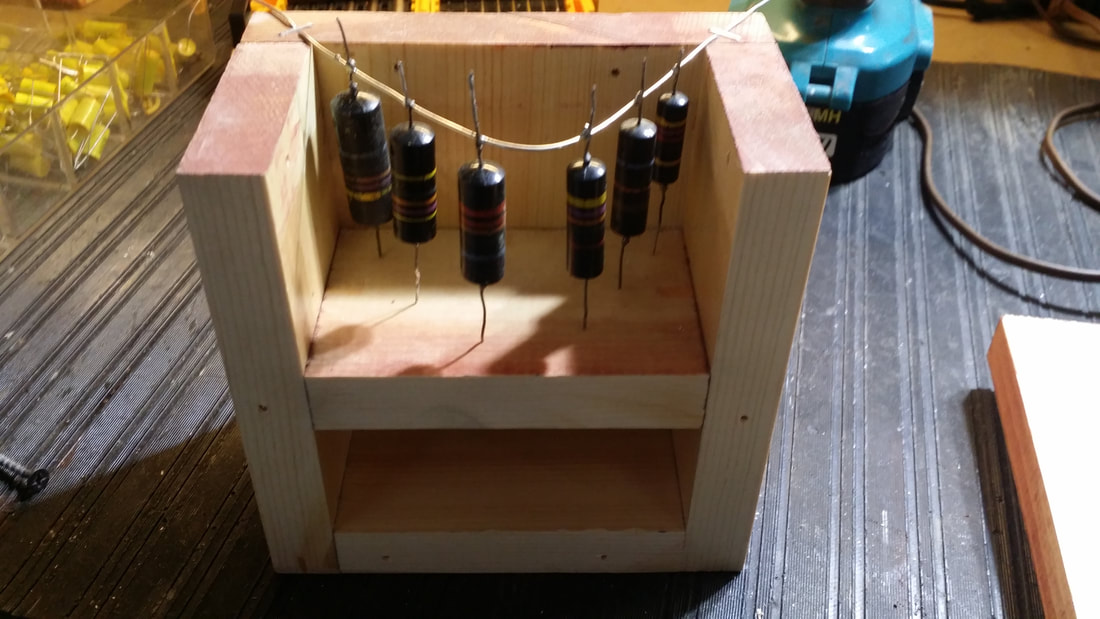 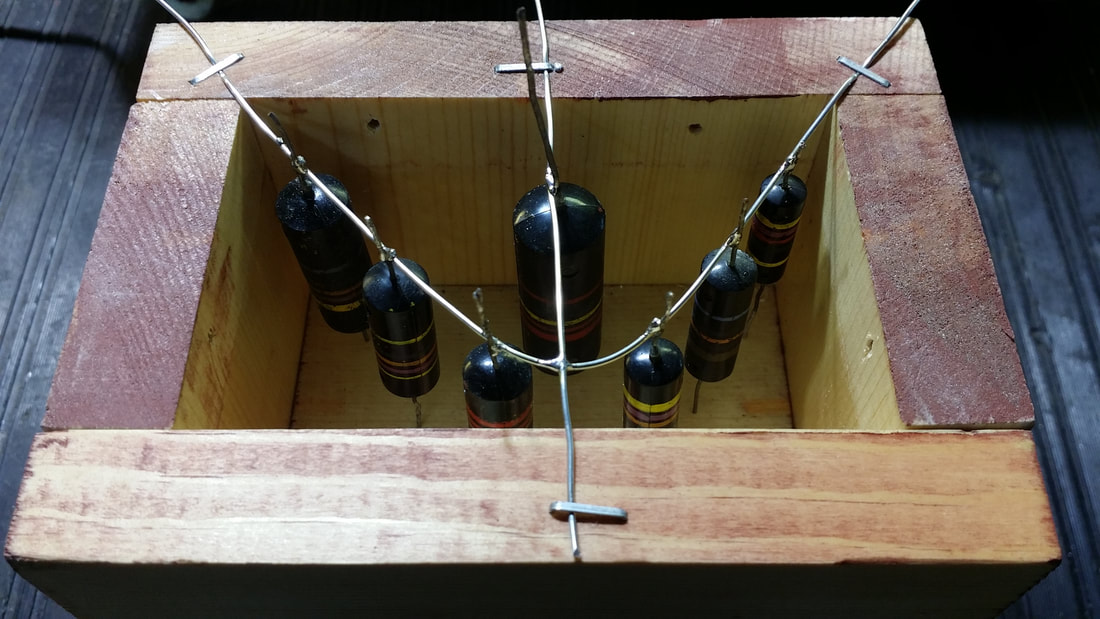 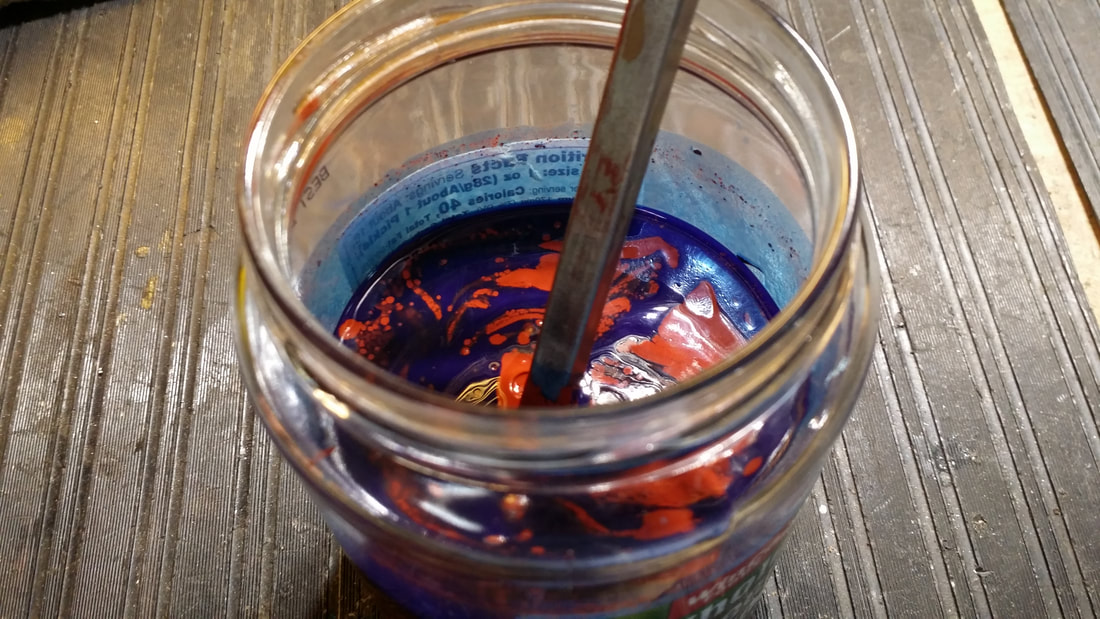 Building a form prior to pouring the molding silicone. Placement of the original components The mix of high-temp silicone and the blue hardener (hardness scale is shore 60A Which will stand up to using many times ). | 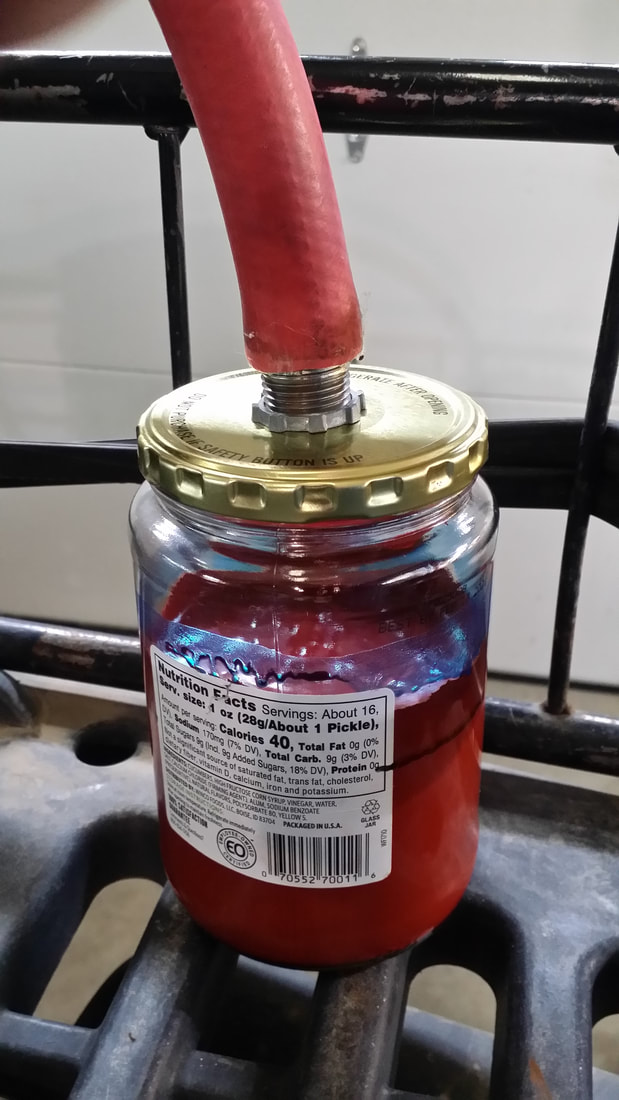 Vacuum jar to remove air bubbles from the silicone after mixing with the hardener. |
OH NOOO!! There are at least three ways to do this!
Which way is easiest? Using the glass tubes.
Which way is cheapest? Drilling out the original caps.
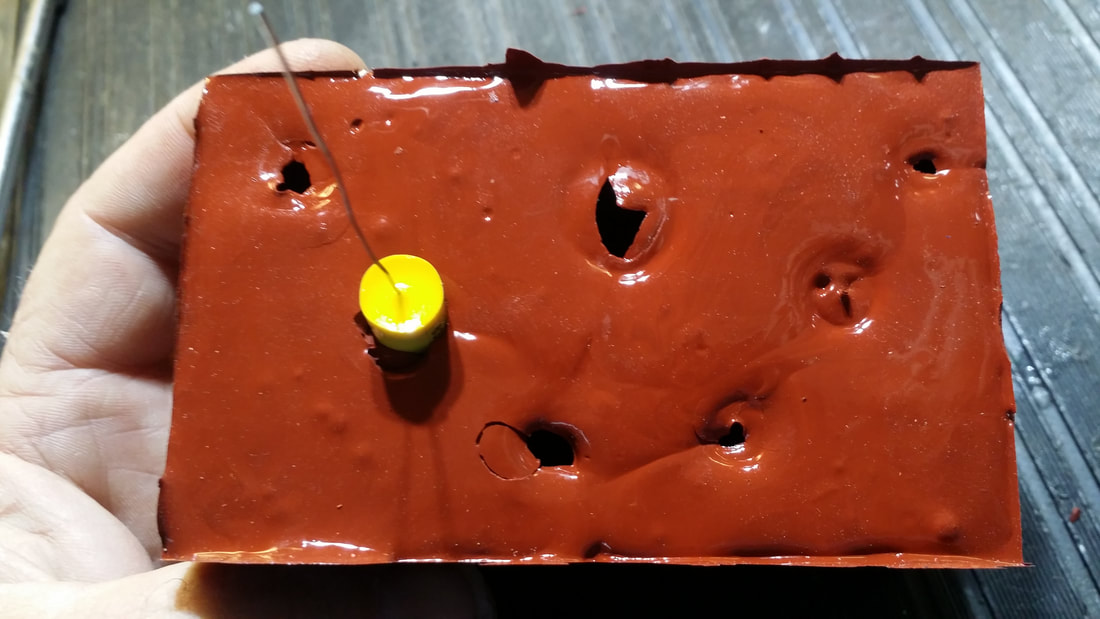
If the original caps are missing, such as in my G500, you must either find originals (I'll bet you have thrown many away), or make some. If you choose the mold method, which is the most difficult to get started, you will need to build a form. I have built several sizes that can be reused. The one you see above has an adjustable base so that thickness can vary depending on the part being made. You can use silicone from the hobby store but it results in a mold that is flimsy and probably will not stand up to more than a few uses. Build your forms sturdy and accurately so they can be reused and most important, so they will not leak as the compound hardens. Use mold release. You will need an accurate scale to mix the components 100/3 by weight.
Though the red stuff is expensive ($90/gal) the hobby-store stuff probably costs more for the same quantity. I am just guessing, but, the HS stuff is probably close to shore 30A, So thicker walls will be needed on the mold so it will not twist or deform.
Which way is easiest? Using the glass tubes.
Which way is cheapest? Drilling out the original caps.
If the original caps are missing, such as in my G500, you must either find originals (I'll bet you have thrown many away), or make some. If you choose the mold method, which is the most difficult to get started, you will need to build a form. I have built several sizes that can be reused. The one you see above has an adjustable base so that thickness can vary depending on the part being made. You can use silicone from the hobby store but it results in a mold that is flimsy and probably will not stand up to more than a few uses. Build your forms sturdy and accurately so they can be reused and most important, so they will not leak as the compound hardens. Use mold release. You will need an accurate scale to mix the components 100/3 by weight.
Though the red stuff is expensive ($90/gal) the hobby-store stuff probably costs more for the same quantity. I am just guessing, but, the HS stuff is probably close to shore 30A, So thicker walls will be needed on the mold so it will not twist or deform.
Cast replacement above. "Sand" resistor needs new sand.
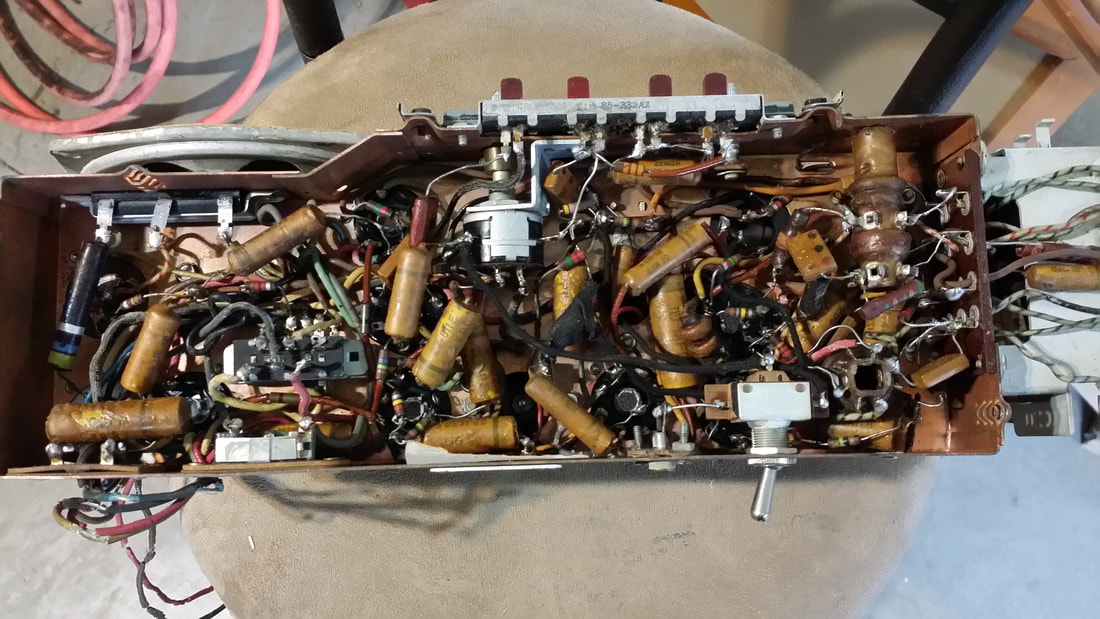
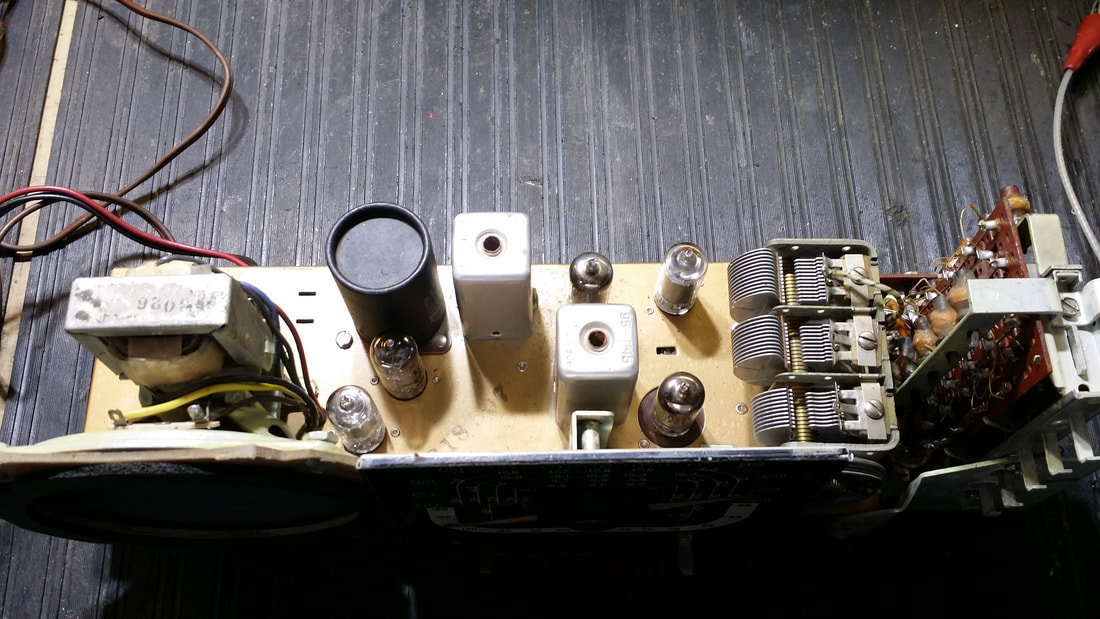
Above is the underside of a 8-tube chassis which uses the standard paper caps of the time. The paper caps can be restuffed .
So there you have it. Restoring one of these radios to the original appearance and function is not impossible, just time consuming. As always - if you are going to do a job, do it to the best of your abilities
So there you have it. Restoring one of these radios to the original appearance and function is not impossible, just time consuming. As always - if you are going to do a job, do it to the best of your abilities

 RSS Feed