
If you are new to my blog - HI. If you have read a few of my posts you already know that I have a tendency to go to extreme lengths to recreate original-looking parts for my radio restorations. and, this one has been on my mind for a while now.
Below is a picture of "Number 2" the 1926 Neutrowound receiver that almost became a "parts set".
https://www.russoldradios.com/blog/number-two
Without restating the story linked above, it was a wet, nasty, rusted mess, missing all but two of the tube shields.
These radios are expensive. Parts, particularly the shields/caps are seldom for sale and when they are tend to demand a high price. Searches for after-market replacements resulted in finding a lot of interest in finding replacements with only the slightest hint that someone might have made a few - at one time.
SO, what to do?
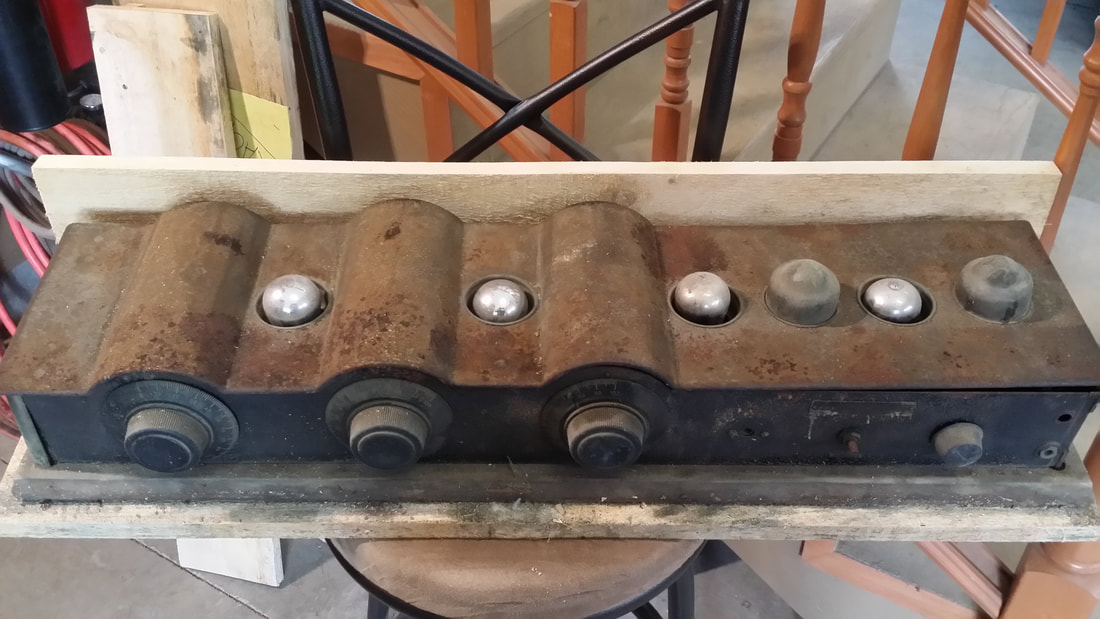
Yep, there were 2 remaining shields/caps when I received the radio. I borrowed one for the other example, which is on display in our museum leaving this radio short 5 caps.
The restoration turned out just fine but one of the measures of value/sales price is whether the caps are missing. A radio in similar condition might be worth twice as much as one missing the caps. The only source for replacements is scavenging them from poor examples, that, while cheaper, might still cost $200 or $300. Add to that cost the long wait for such a "parts set" to become available for sale.
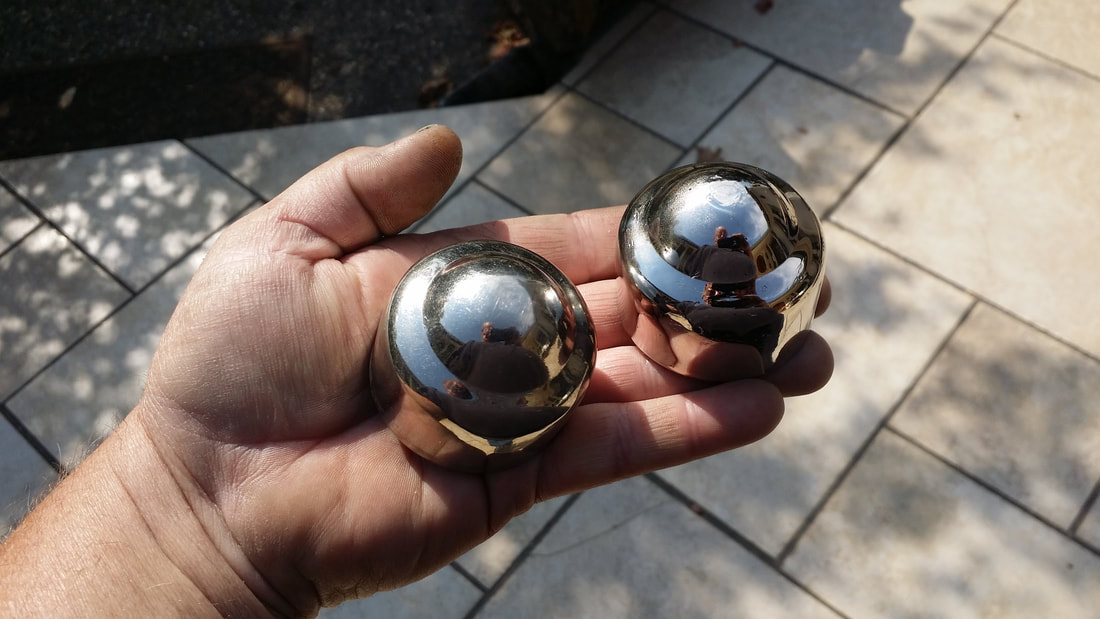
So, I had to find a way to make replacements. Above is an original and the first of the ones I have made.
The originals seem to be brass, formed by stamping on a dye. There are parallel marks on the sides of the originals left by this process. Then the parts are nickel plated. A small hole is present where the part was hung on a wire in the plating solution.
It is possible that one could convince a machine shop to construct new dyes. Then stamp out original=looking parts that would to be sent to a plating shop. It would probably be cheaper to purchase one of those expensive parts-sets from E-Pay.
There has been some discussion about making parts through a process of electroforming. This can work well, with good results on small, flat parts or parts with shallow depth. Larger parts can be a problem.
I really did not expect this to work - I'll tell you why - and tell you why it did.
First, a friend, Harry, needed some 2 watt dog-bone resistors. I had never made a form/mold for these. Construction of the form is not too complicated. Making the mold - one that works, or works more than once can be a challenge. The sturdy, fairly ridged, high-temp silicon is not cheap. But since Harry was going to buy some for his project I thought that this would be a good time to try.
The red, 2-part silicone is rated at 60 on the Shore-A hardness scale, a measurement for flexible plastics. The parts must be weighed and mixed. Then, air bubbles must be removed ( a process I wish I had invested more time, but again, I really thought this would not work). Fortunately, I had a good scale and the other necessary tools. OH(!), also, I had an example from which to make the mold. Without having one of the original caps, this would have been much more difficult.
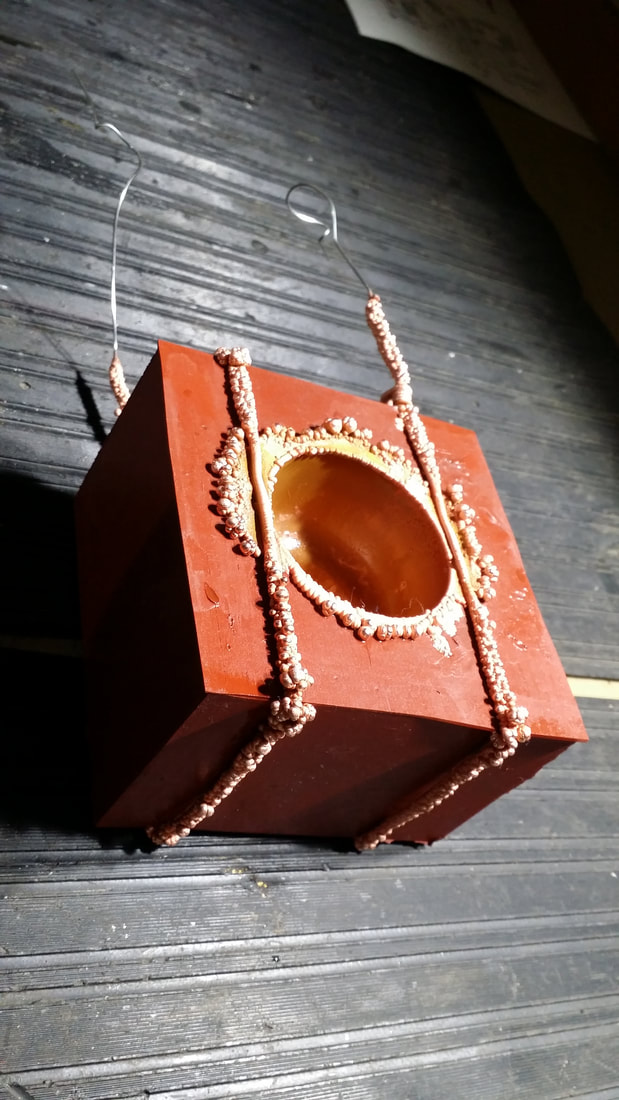
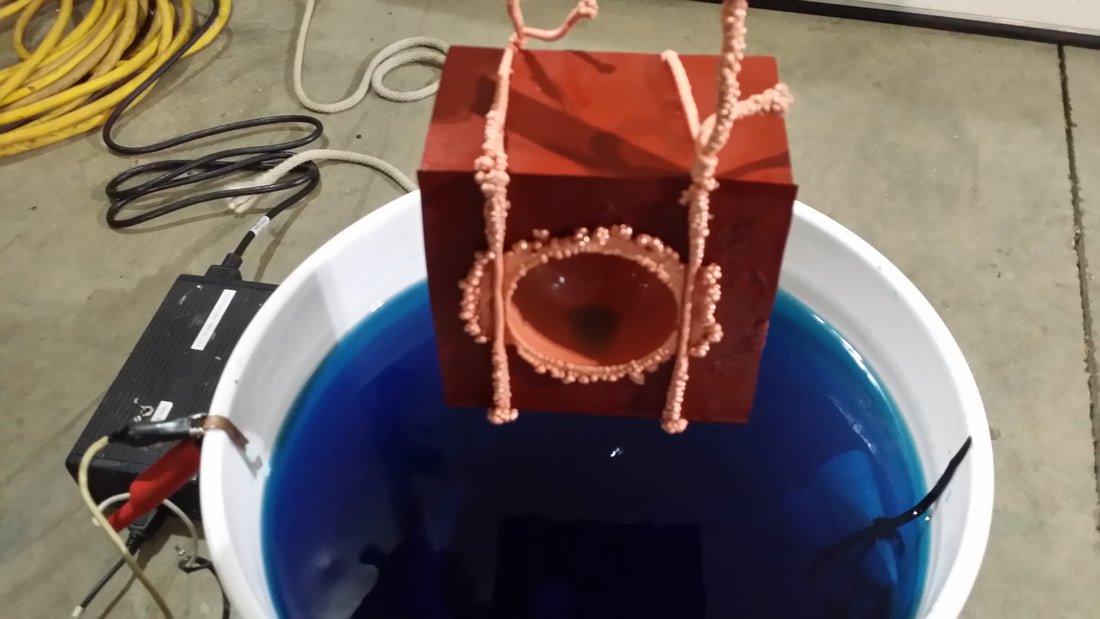
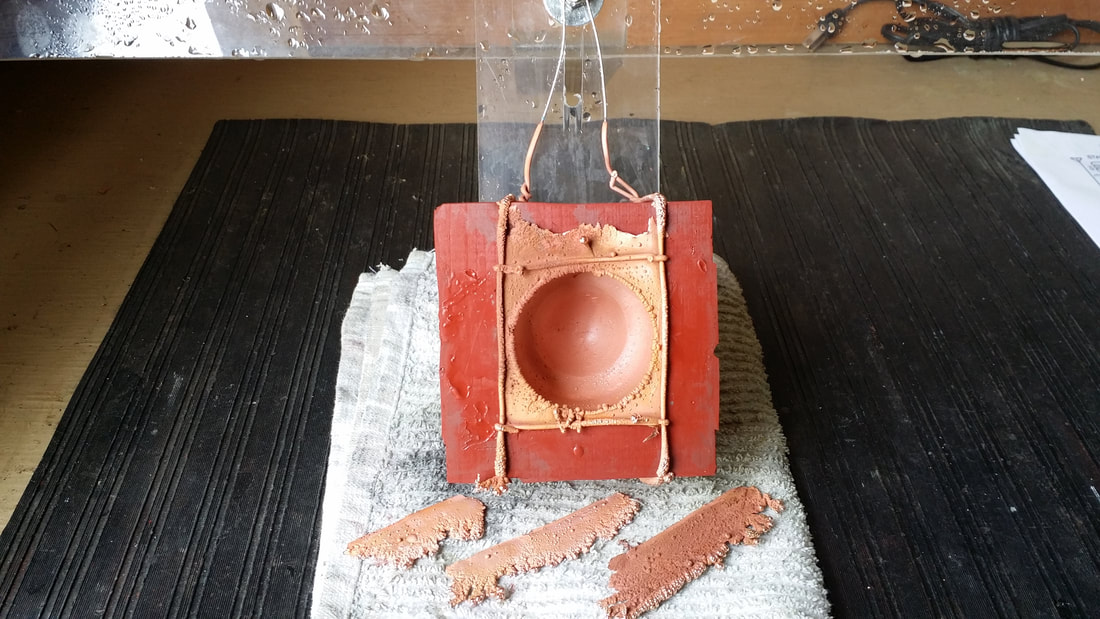
Above, nodules of copper form on the outer part of the mold and the wires used to conduct voltage to the plating cathode.
At this point I should point out the need for a plating set-up like the ones I have used in previous projects but in this case, I wasn't plating a part but, rather making one.
The inside of the silicon mold is brush-painted with graphite powder. This stuff is worse than the silicone for getting on everything. So care must be taken or your tools and the operator will be covered with the stuff. It really does a good job of making a conductive surface which, with the buss-wire conducts the negative charge to the mold.
Throw, or the ability to plate, especially into a hole, is the challenge here. For tube-people this should not be hard to visualize. The charged particles from the solution are attracted to the negative electrode. New, replacement metal moves into solution from the anode which is a copper plate. Like in a vacuum tube, the charges move most easily between the closest points of the anode and cathode. This makes throwing into the hole difficult. As you can see, copper collects on the face of the mold and the wires. Getting it into the bottom of the hole is nearly impossible without redesigning the anode.
Below, the part removed from the mold. The small specks on the surface are caused by imperfections in the mold (bubbles) but these are easily removed in the polishing process.
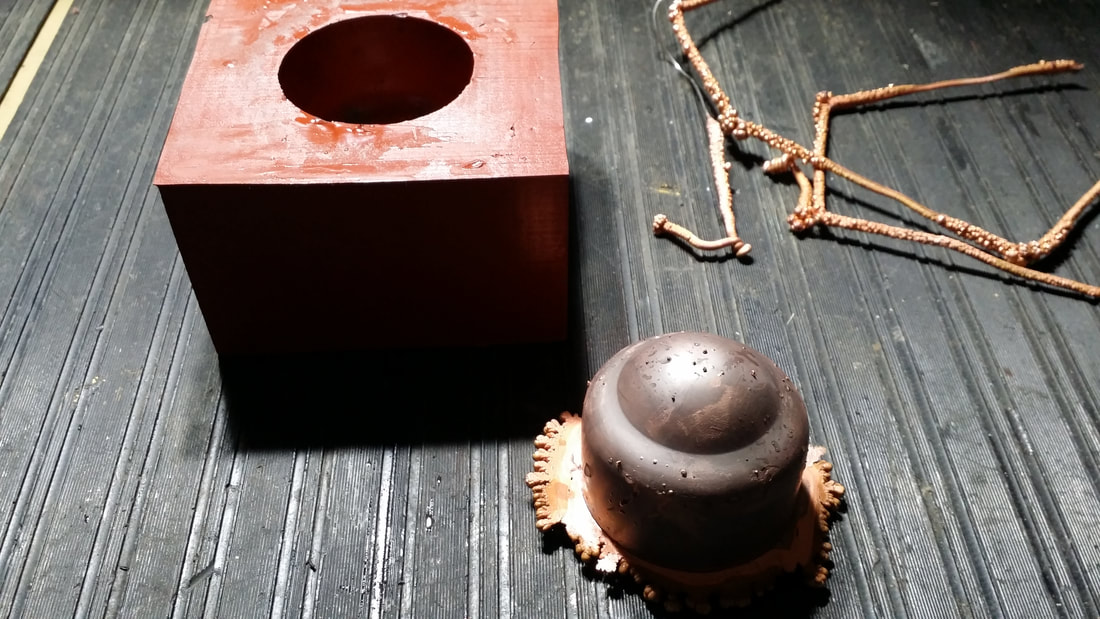
Removing the flashing and polishing the part prior to the last step is probably the most time consuming.
Unlike with woodworking or painting, the part must be polished PRIOR to the last finishing step. This will result in a flat, shiny surface after the nickel is applied. Some polishing can be done to the nickel but it is way to late to remove scratches or other imperfections after the nickel is applied.
Unlike with woodworking or painting, the part must be polished PRIOR to the last finishing step. This will result in a flat, shiny surface after the nickel is applied. Some polishing can be done to the nickel but it is way to late to remove scratches or other imperfections after the nickel is applied.
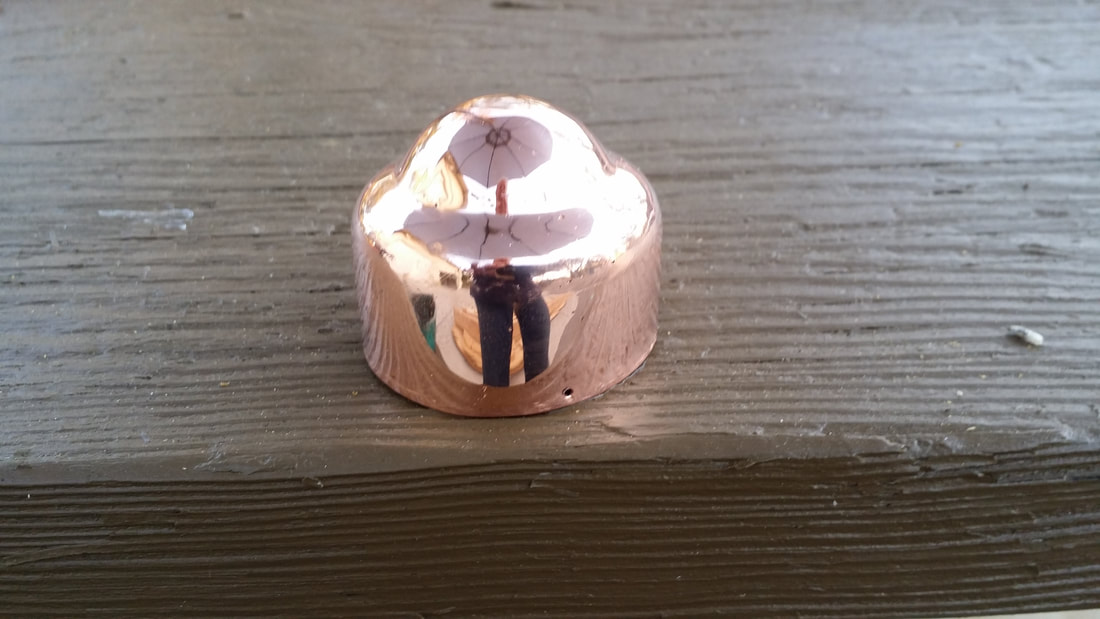
Following the removal of the flashing, the part is polished in preparation for nickel plating.
I like the looks of the polished copper. It would be cool to have a radio with polished copper shields but not very original (looking).
.
I like the looks of the polished copper. It would be cool to have a radio with polished copper shields but not very original (looking).
.
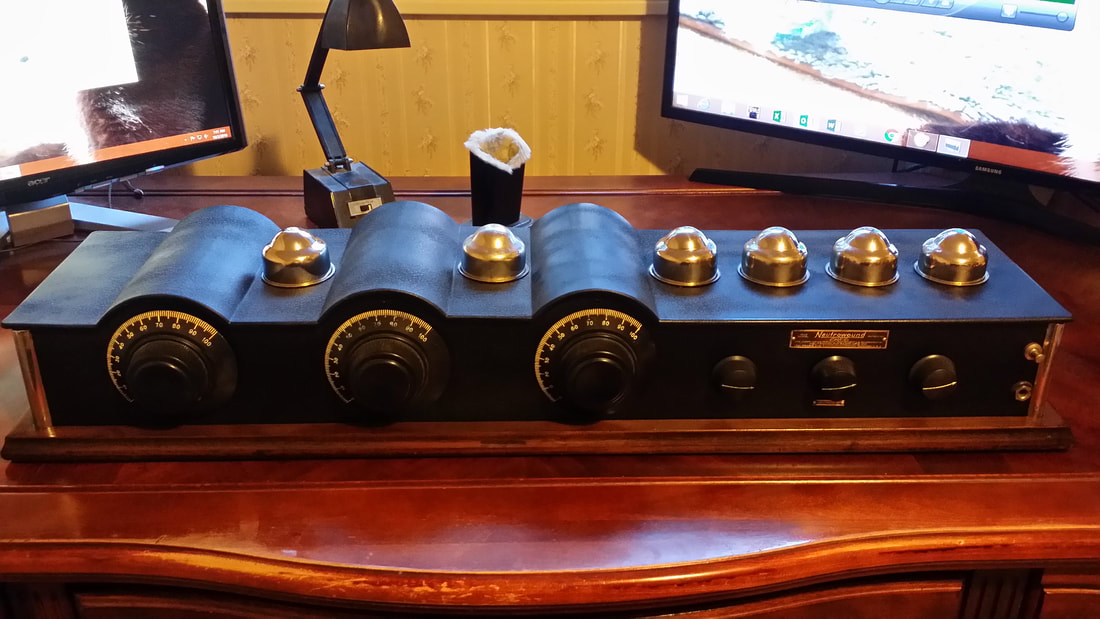
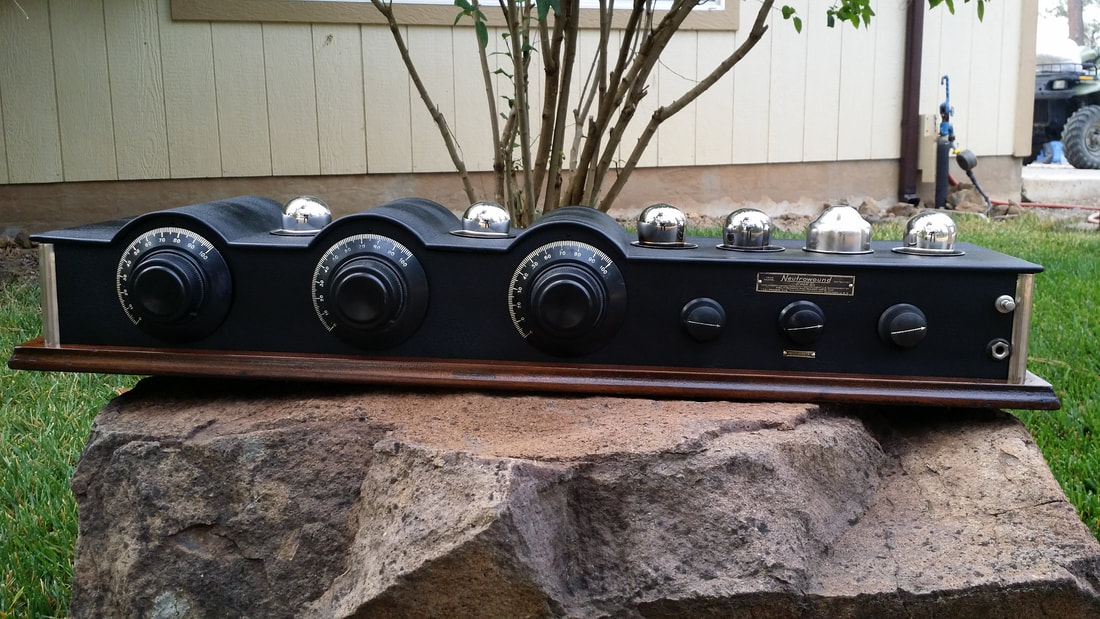
Five new caps. Can you pick out the original? It is near the middle of the radio.
So - Is it likely that I will make enough of these to sell a few - NO. It just takes too long and I have radios to work on.
Do I recommend trying this yourself? Probably not. The initial investment alone for tools and materials is way too much to build JUST these - but if you already have the equipment - possibly.
Why "possibly"? Again, time and difficulty. It is hard to make this work and failures are almost certain.
BUT, now you know that it can be done.
Additional picture of inside added by request:
Plating at or above 1A per Sq. in. will plate faster but more nodules/ferns will appear on the inside and flashing.

 RSS Feed